
Tutorial – Coloring and Clipart in Photoshop CS2
This tutorial will walk you through some tips and tricks for coloring clipart in Photoshop CS2. Clipart can be a very useful tool in digital scrapbooking, but not all clipart is created equal. Some clipart is too fuzzy to enlarge to the point where it can be used in a layout. Select your clipart wisely.
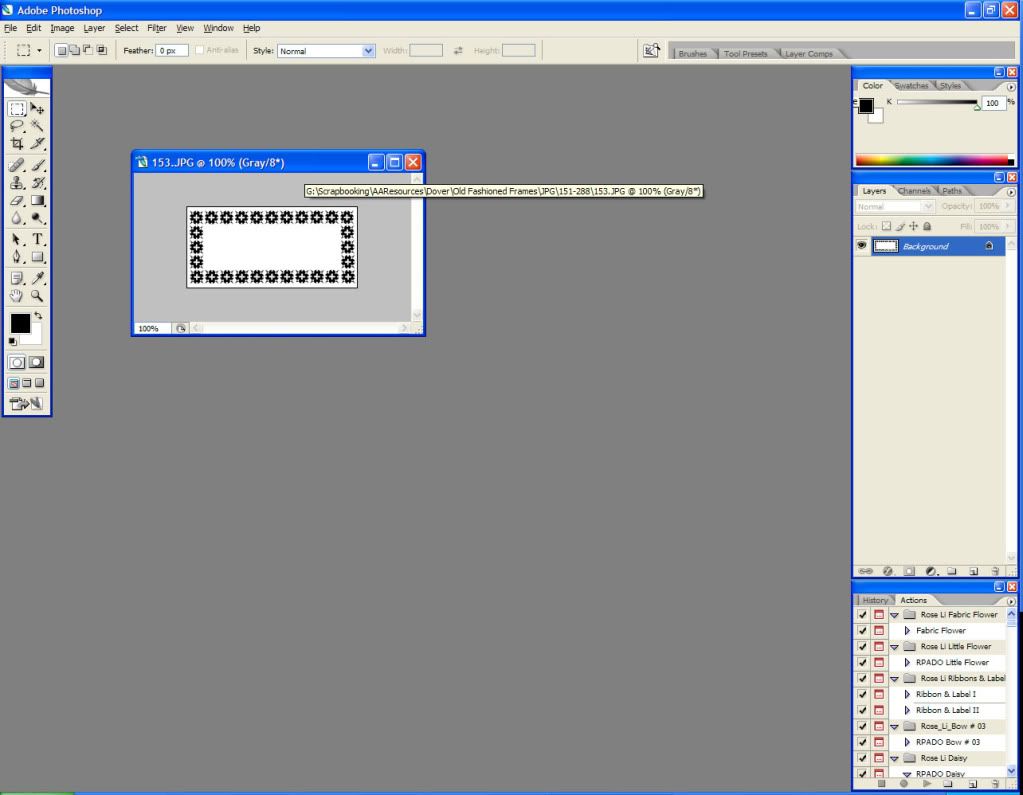
The frame that I’m using today comes from Dover’s “Old-Fashioned Frames” collection.
Step 1
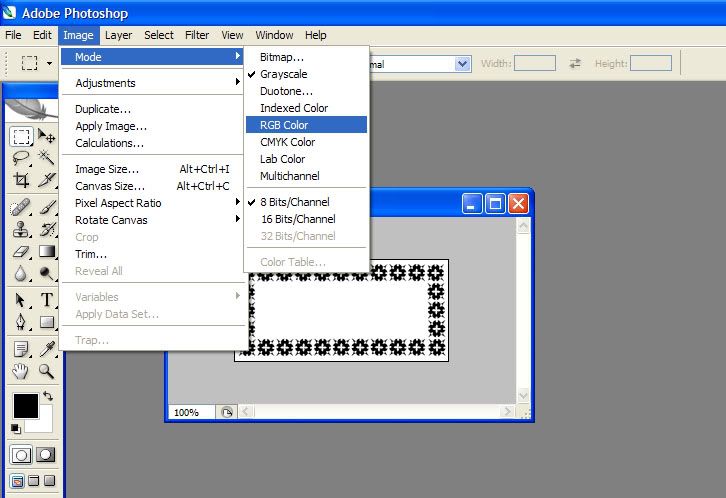
First, I’m going to change it from Grayscale to RGB Color so that I can pretty it up. To do this, I’m going to Image > Mode > RGB Color.
Step 2
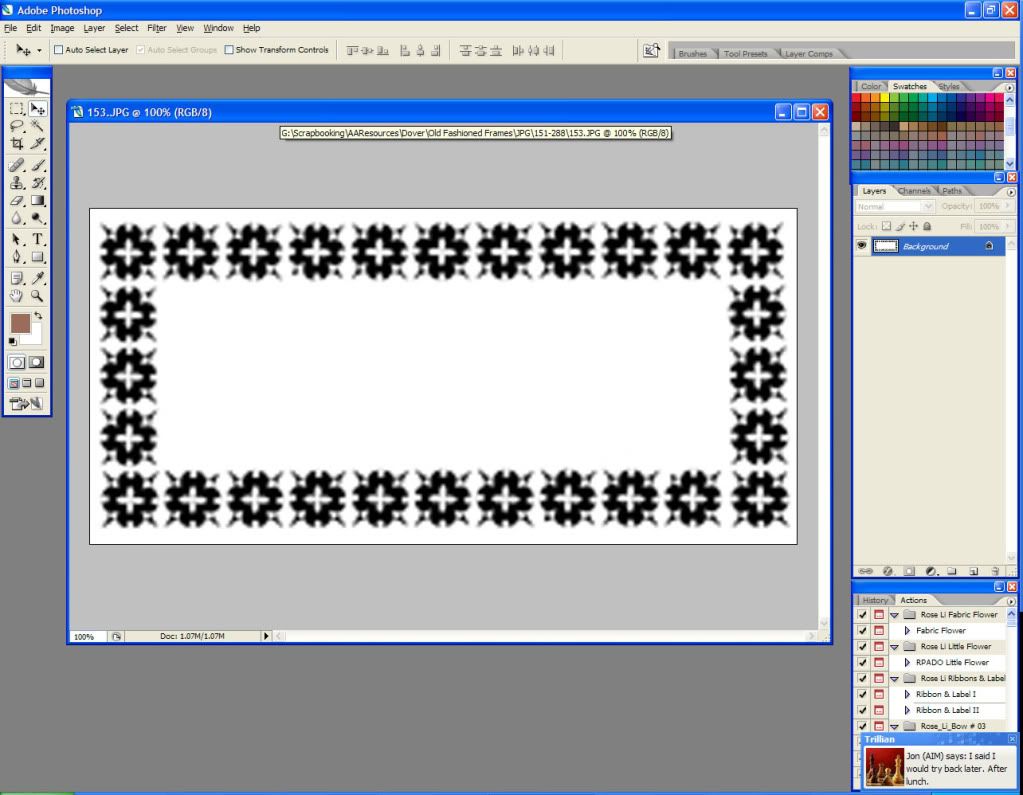
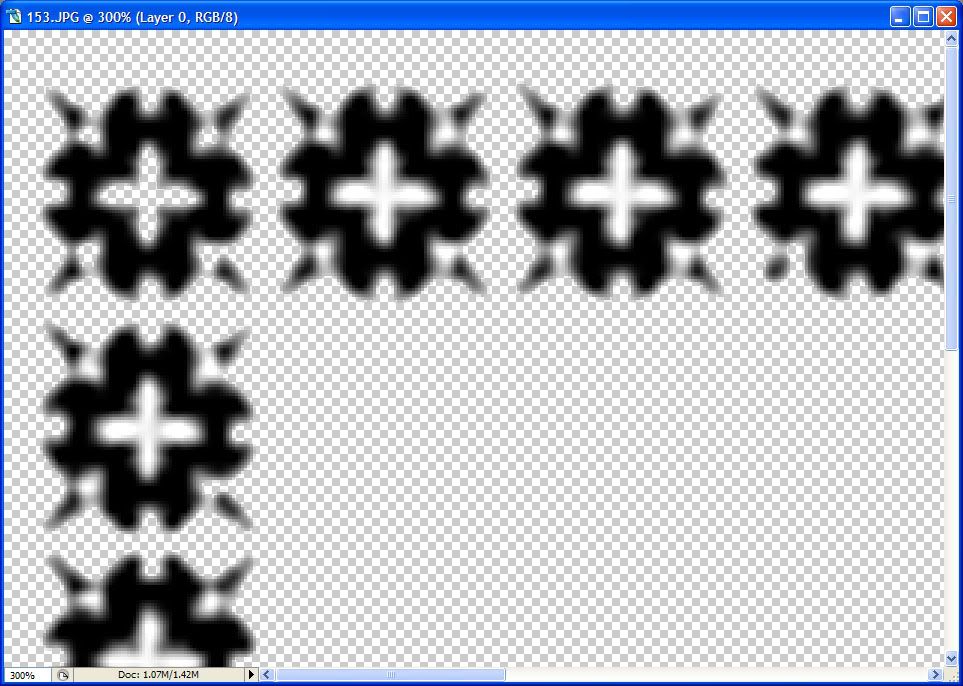
Now I’m going to increase the resolution. Much of the clipart that I work with (almost exclusively Dover) is 72 dpi, which is not nearly enough for use in digital scrapbooking. I’m going to increase it to 300 dpi. Sometimes this fuzzes the clipart out to the point where it becomes unusable; it’s just a chance you take when using clipart.
To increase the dpi, I go to Image > Image Size and increase the Resolution in the next window to 300. Note that this increases the image’s size as well.
Step 3
Here’s the result (LOL with a bonus IM from my husband…). It’s a little fuzzier, but I think I can still work with it.
Result
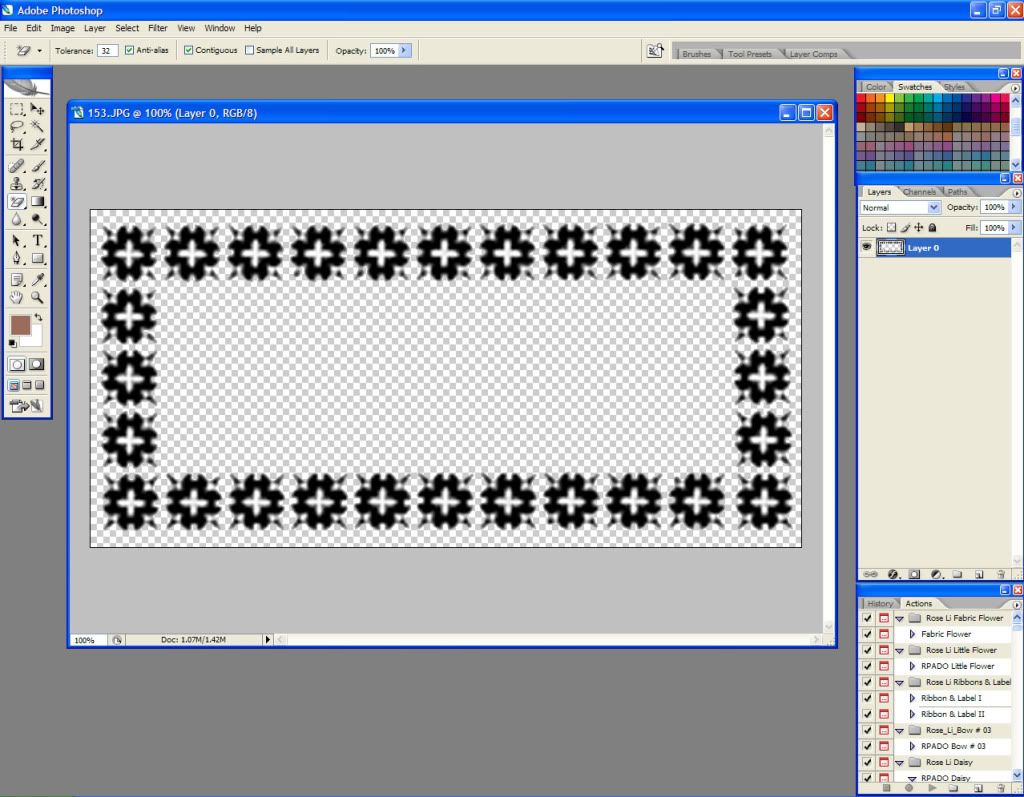
I’m going to erase the superfluous white that I don’t need. I do this with the Background Eraser tool.
Step 5
Hmm, there’s still some white in the little nooks and crannies, so I’ll have to go in and erase those pieces as well. Yet another pitfall of using clipart.
Step 6
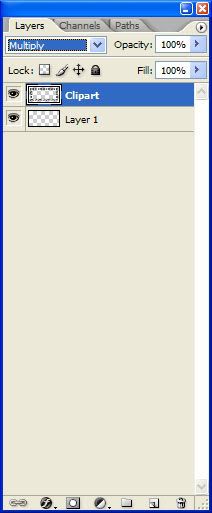
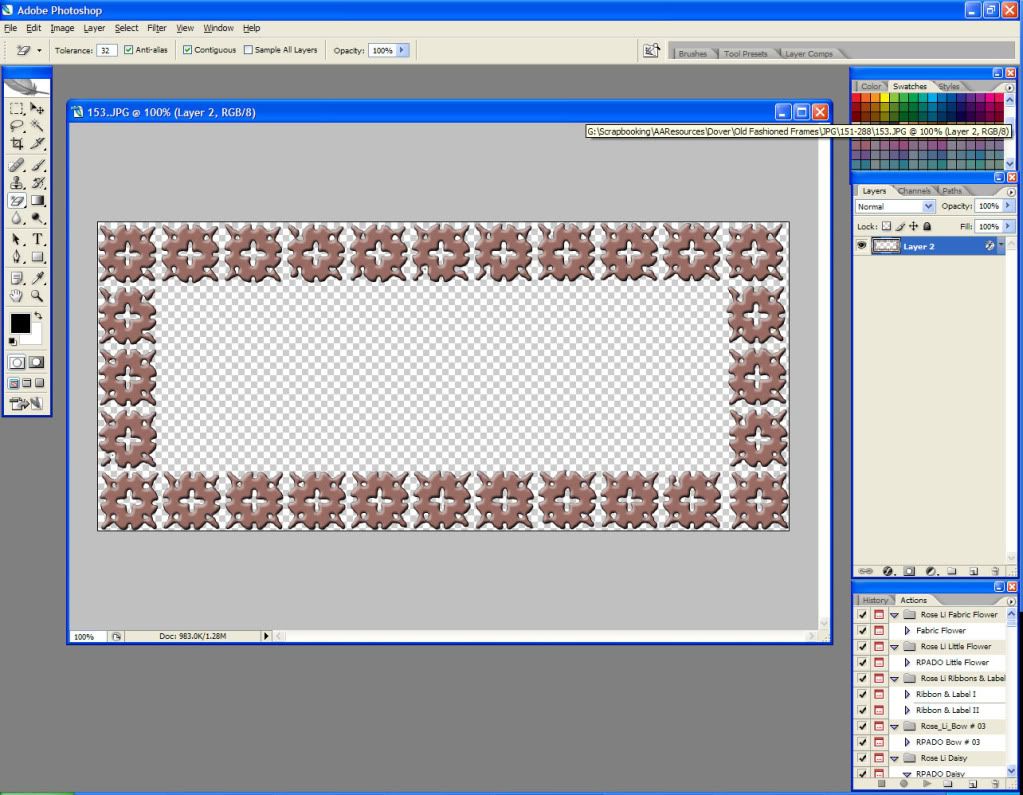
Once I have those pieces erased, I’m going to add a new layer and move it below my original clipart layer. I change the blend mode of the clipart layer to Screen.
Step 7
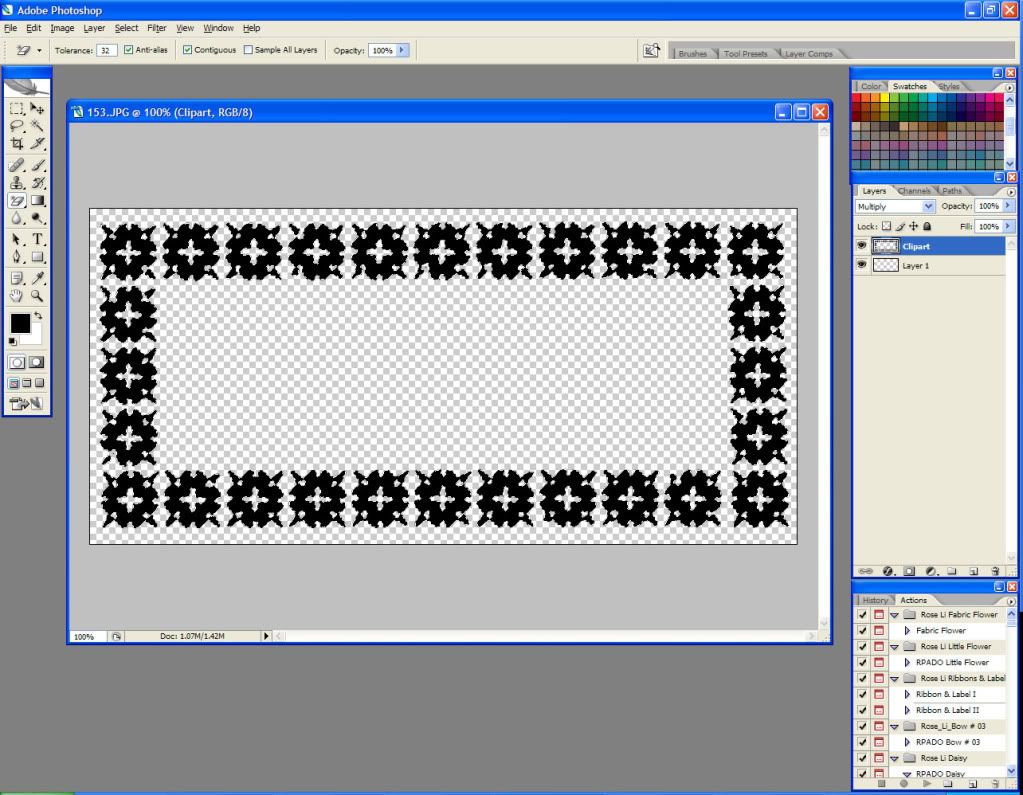
I’m going to select the clipart by holding down Ctrl and left-clicking on the thumbnail in its layer. I fill the selection with black to make the edges more distinct.
Result
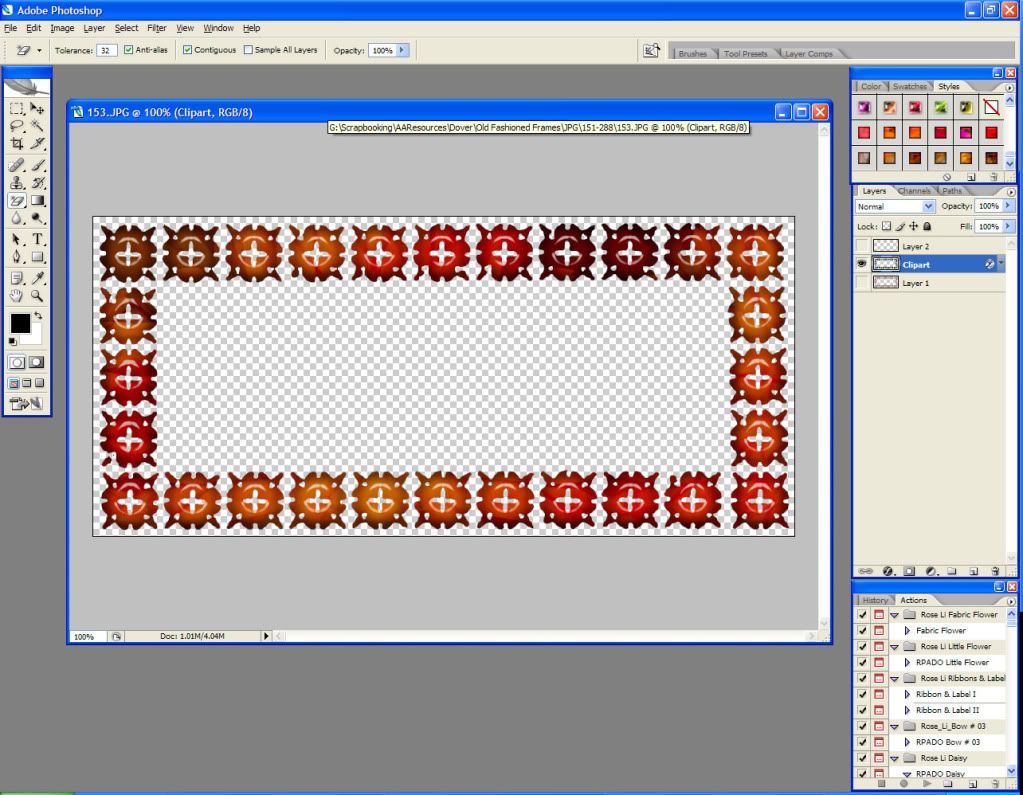
Now, in my new layer, but with the clipart still selected, I fill with the color of my choice.
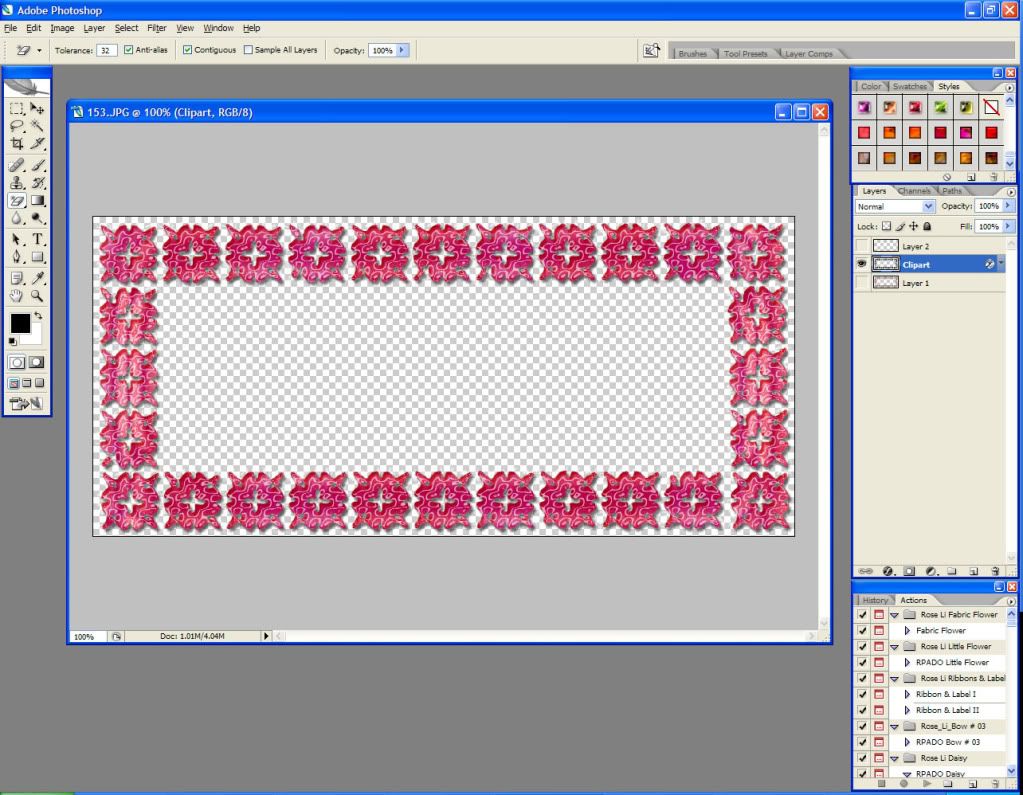
Step 8
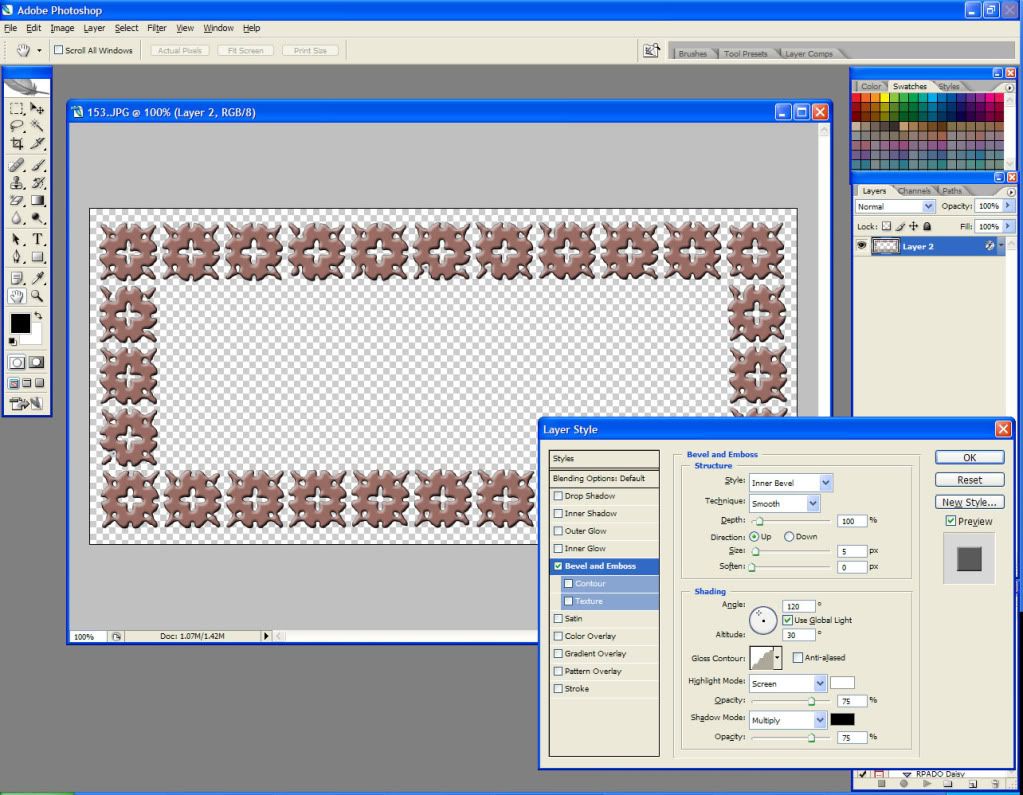
That looks pretty good, but I want to add an outline. With the clipart still selected, I create a new layer and put it on top of all the others. I go to Edit > Stroke and stroke the inside of the selection with a 1 pixel brush and black color.
I add a bit of a bevel to make the frame more distinct.
Step 9
Now I’m going to go to Image > Trim and trim all transparent pixels so that there isn’t any empty space around my frame.
Step 10
And that’s it! Save it as a .png to keep the background transparent.
Instead of coloring clipart this way, you could merely add a layer style to the original clipart layer (although I do recommend duplicating the layer and hiding one, just in case you mess up, which I do often).
Here’s an ActionFX style (www.actionfx.com):
ActionFX Style
And here’s an Adventurine layer style (available at www.Renderosity.com):
Adventurine Style
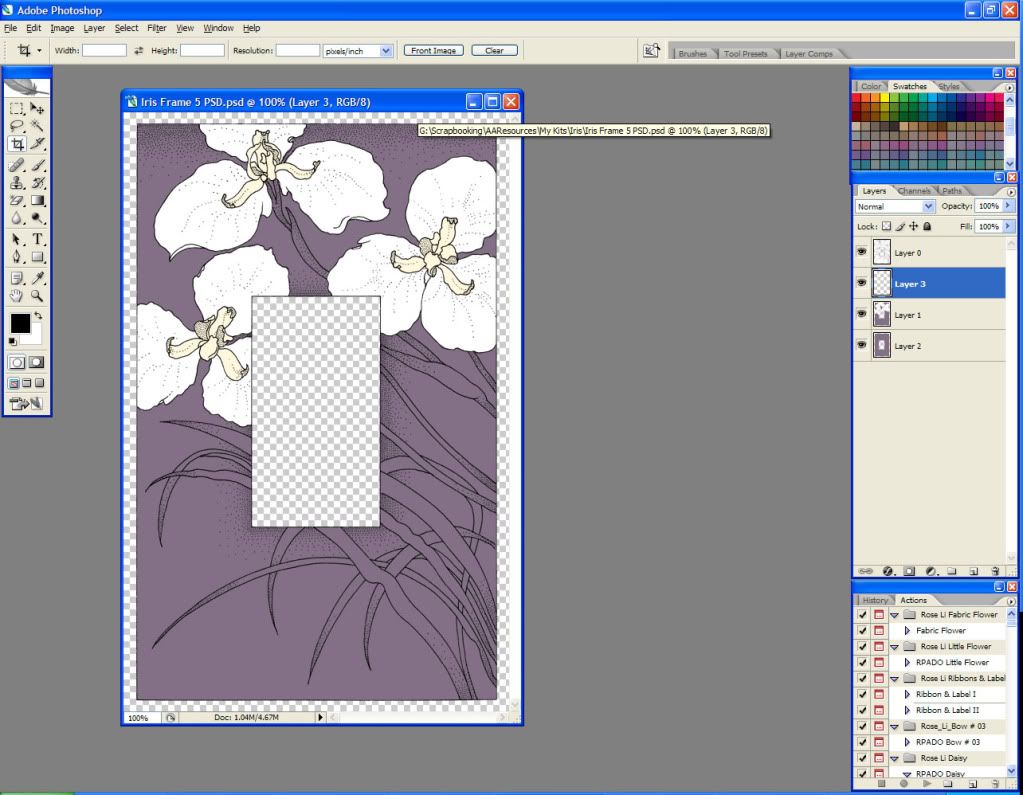
Now I’m going to switch tactics and show you some basic cell coloring techniques for clipart. This frame comes from the “Decorative Flower Designs” collection at Dover, and I’m coloring it in order to include it in my “Iris” digital scrapbooking kit.
Original Clipart
Here’s where I’m at with the coloring:
Partially Colored
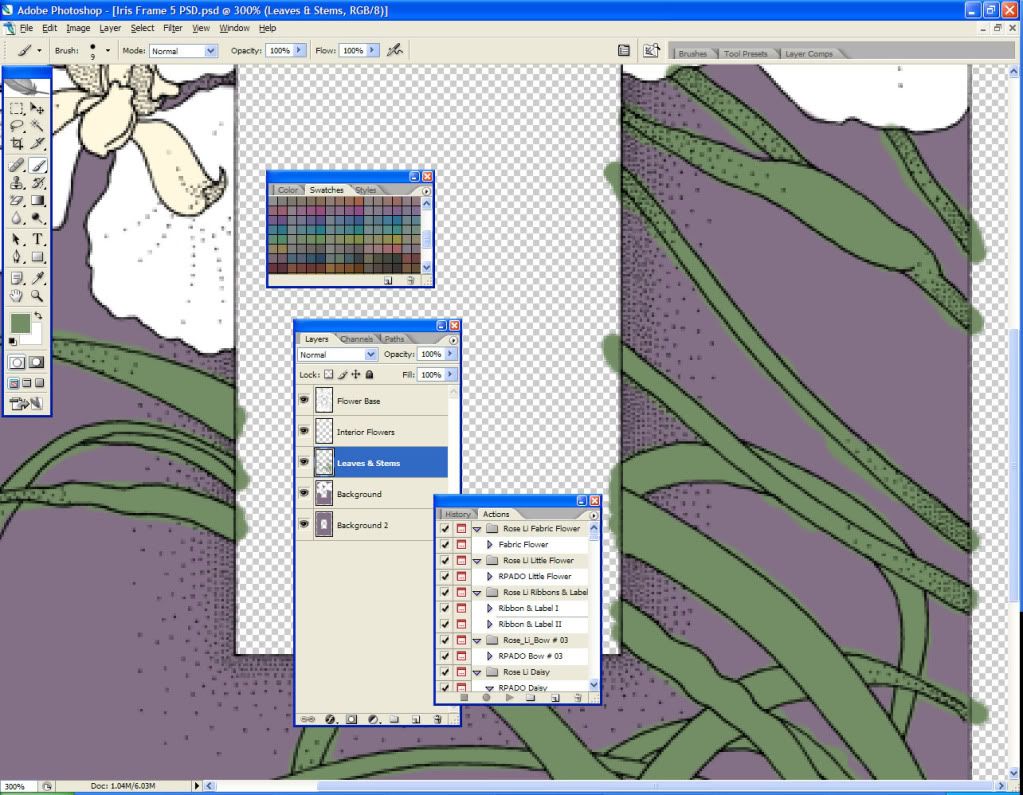
As you can see, I’ve got the background colored, the flower base, and the yellowish insides of the flowers. Now I want to color the leaves and stems. I create a new layer and put it right below the background layer. I select a green color and start painting (this is easiest with a tablet, but doable with a mouse). It’s ok if you go outside the lines; just erase it when you’re done. I use a small hard brush for this step.
Crappy coloring job
My kindergarten teacher in Liberia would not have been amused at this attempt at coloring. Now I zoom in and erase any superfluous green that I don’t want.
My typical MO for this step is to slop on the color in a few seconds, then spend 10x as long erasing what I don’t want. It’s messy, but it works.
Here is the finished product:
Result
Nice, eh?
Now I’ll show you a couple of quick and dirty ways to change the color of a picture.
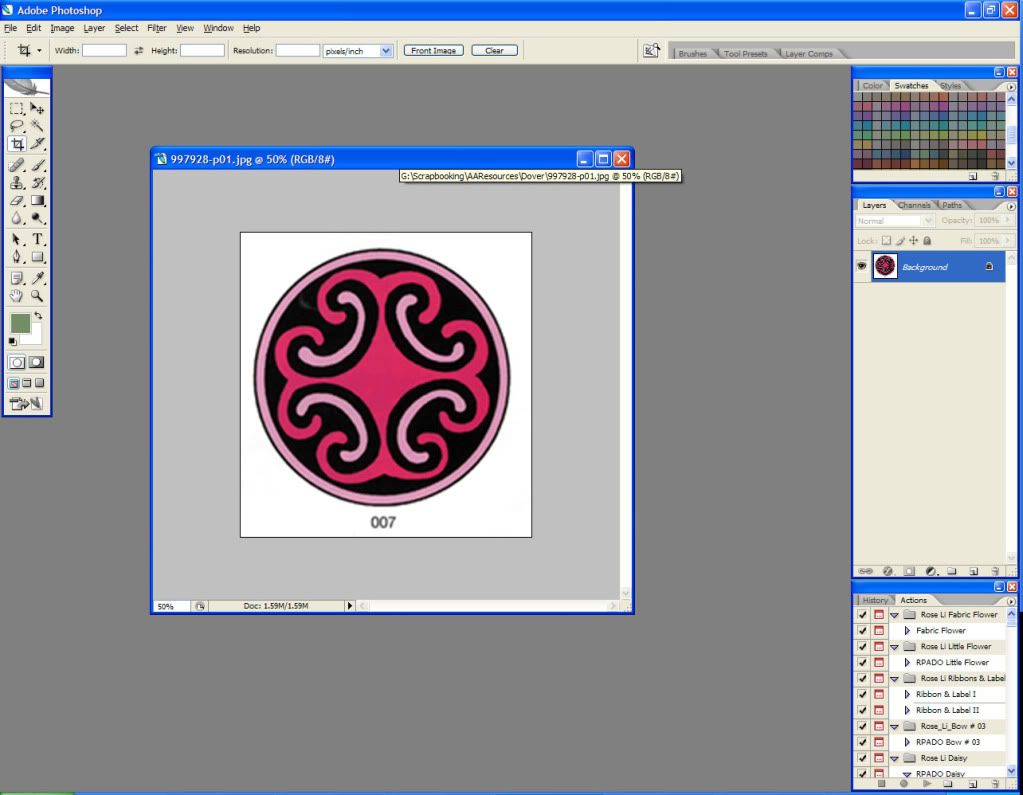
Here’s a picture that I got in a Dover sampler:
Original Clipart
I’ve increased the resolution to 300, just as I did in the first example in this tutorial.
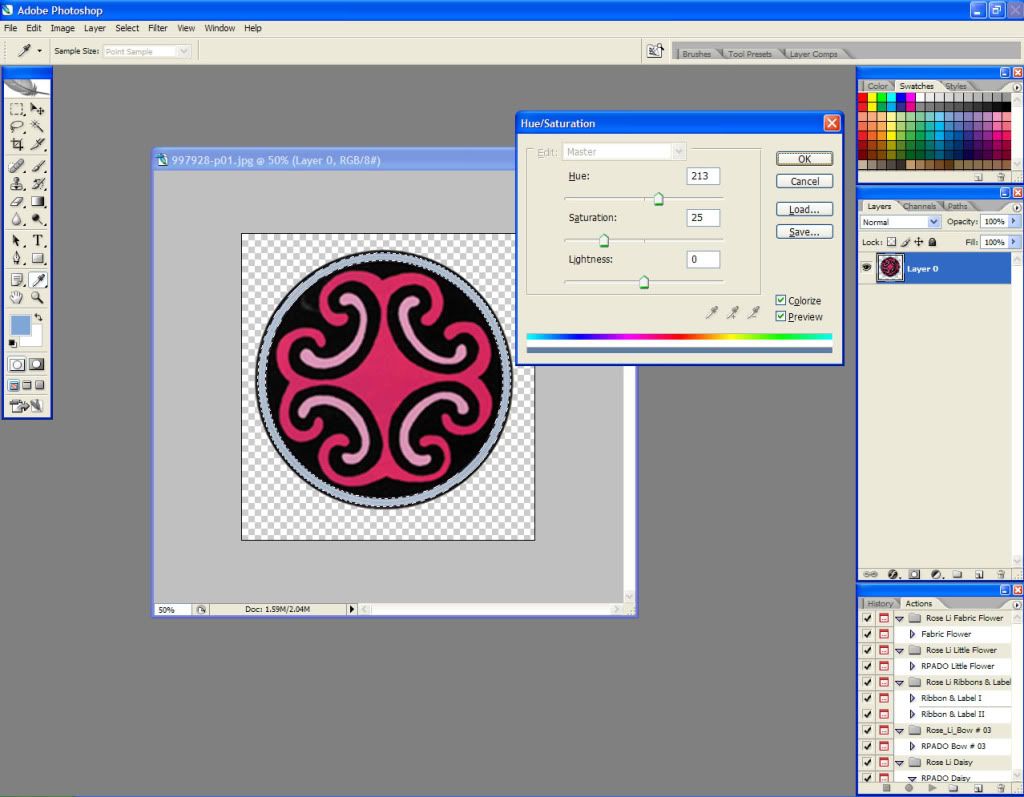
I want to change the colors to blues. I use the background eraser to get rid of the white. Using the Magic Wand tool, I’m going to select the first shade. Notice that it only selected the outer rim; that’s ok, we’ll just go slowly and step by step.
Step 1
I select the color that I want to use and put it into my Foreground color. Then, I go to Image > Adjustments > Hue and Saturation.
Step 2
Putting a check mark in the “Colorize” field turns anything that’s selected into a variation on the color that I have in my foreground. So now the outer rim is a pretty blue.
Result
I do the same with the other lighter pink areas in the piece.
Result
Then I select the darker pink area and repeat.
Result
I have now changed the pink ornament to a blue one. Pretty!
There’s another way to change the color of a picture, although it doesn’t allow for varying the color. Going back to the original pink ornament, I’m going to create a new document and fill it with the blue that I’m using. It doesn’t have to be a big document; just 50x50 pixels is fine.
Step 1
Now I’m going to go to Image > Adjustments > Match Color.
Step 2
In the “Source” drop-down, I select the name of the document that has the color I want (in this case, it’s “Untitled-1” because I didn’t save the 50x50 file). Click OK.
Window
Here’s the result:
Result
Now this isn’t a perfect method. As you can see, it changed the pink areas to a white and the black areas are now bluish. Sometimes this works, and sometimes it doesn’t. Play around with it and when it works, great. When it doesn’t, try something else. I have found that this works great when you are participating in a challenge or competition and have to use specific colors from a palette.
I hope that this tutorial has been helpful. If you have any questions, please don’t hesitate to email me at maitri@mchsi.com or IM me at MaitriScraps on AOL IM. Comments on the blog are always appreciated.
To download the frames and ornament that I was working with, click
Here.
Happy scrapping!
This tutorial will walk you through some tips and tricks for coloring clipart in Photoshop CS2. Clipart can be a very useful tool in digital scrapbooking, but not all clipart is created equal. Some clipart is too fuzzy to enlarge to the point where it can be used in a layout. Select your clipart wisely.
The frame that I’m using today comes from Dover’s “Old-Fashioned Frames” collection.
Step 1
First, I’m going to change it from Grayscale to RGB Color so that I can pretty it up. To do this, I’m going to Image > Mode > RGB Color.
Step 2
Now I’m going to increase the resolution. Much of the clipart that I work with (almost exclusively Dover) is 72 dpi, which is not nearly enough for use in digital scrapbooking. I’m going to increase it to 300 dpi. Sometimes this fuzzes the clipart out to the point where it becomes unusable; it’s just a chance you take when using clipart.
To increase the dpi, I go to Image > Image Size and increase the Resolution in the next window to 300. Note that this increases the image’s size as well.
Step 3
Here’s the result (LOL with a bonus IM from my husband…). It’s a little fuzzier, but I think I can still work with it.
Result
I’m going to erase the superfluous white that I don’t need. I do this with the Background Eraser tool.
Step 5
Hmm, there’s still some white in the little nooks and crannies, so I’ll have to go in and erase those pieces as well. Yet another pitfall of using clipart.
Step 6
Once I have those pieces erased, I’m going to add a new layer and move it below my original clipart layer. I change the blend mode of the clipart layer to Screen.
Step 7
I’m going to select the clipart by holding down Ctrl and left-clicking on the thumbnail in its layer. I fill the selection with black to make the edges more distinct.
Result
Now, in my new layer, but with the clipart still selected, I fill with the color of my choice.
Step 8
That looks pretty good, but I want to add an outline. With the clipart still selected, I create a new layer and put it on top of all the others. I go to Edit > Stroke and stroke the inside of the selection with a 1 pixel brush and black color.
I add a bit of a bevel to make the frame more distinct.
Step 9
Now I’m going to go to Image > Trim and trim all transparent pixels so that there isn’t any empty space around my frame.
Step 10
And that’s it! Save it as a .png to keep the background transparent.
Instead of coloring clipart this way, you could merely add a layer style to the original clipart layer (although I do recommend duplicating the layer and hiding one, just in case you mess up, which I do often).
Here’s an ActionFX style (www.actionfx.com):
ActionFX Style
And here’s an Adventurine layer style (available at www.Renderosity.com):
Adventurine Style
Now I’m going to switch tactics and show you some basic cell coloring techniques for clipart. This frame comes from the “Decorative Flower Designs” collection at Dover, and I’m coloring it in order to include it in my “Iris” digital scrapbooking kit.
Original Clipart
Here’s where I’m at with the coloring:
Partially Colored
As you can see, I’ve got the background colored, the flower base, and the yellowish insides of the flowers. Now I want to color the leaves and stems. I create a new layer and put it right below the background layer. I select a green color and start painting (this is easiest with a tablet, but doable with a mouse). It’s ok if you go outside the lines; just erase it when you’re done. I use a small hard brush for this step.
Crappy coloring job
My kindergarten teacher in Liberia would not have been amused at this attempt at coloring. Now I zoom in and erase any superfluous green that I don’t want.
My typical MO for this step is to slop on the color in a few seconds, then spend 10x as long erasing what I don’t want. It’s messy, but it works.
Here is the finished product:
Result
Nice, eh?
Now I’ll show you a couple of quick and dirty ways to change the color of a picture.
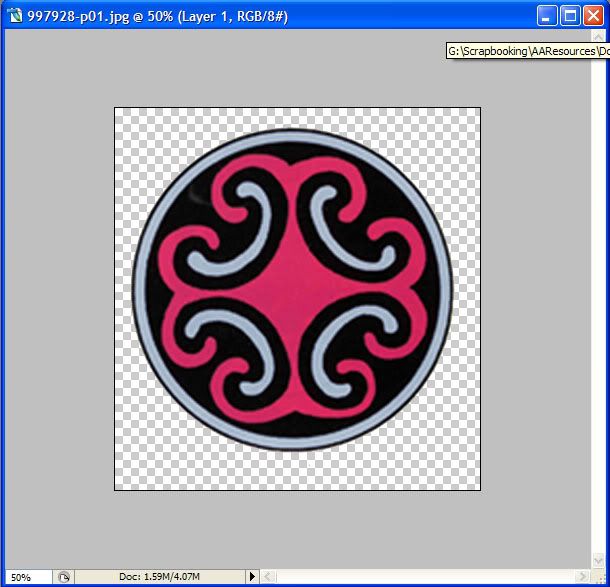
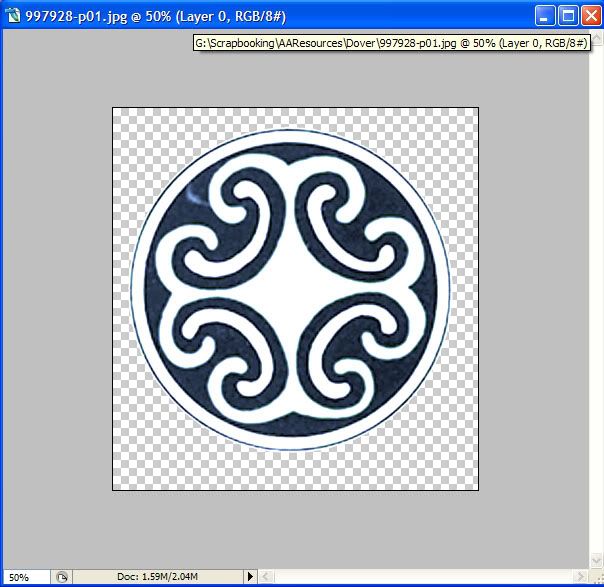
Here’s a picture that I got in a Dover sampler:
Original Clipart
I’ve increased the resolution to 300, just as I did in the first example in this tutorial.
I want to change the colors to blues. I use the background eraser to get rid of the white. Using the Magic Wand tool, I’m going to select the first shade. Notice that it only selected the outer rim; that’s ok, we’ll just go slowly and step by step.
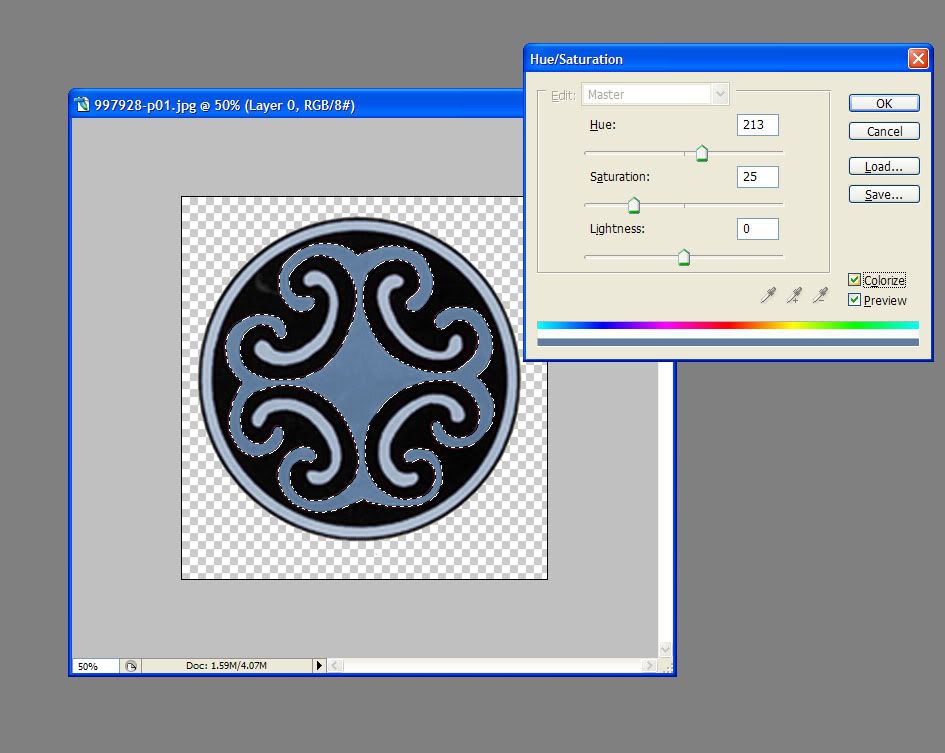
Step 1
I select the color that I want to use and put it into my Foreground color. Then, I go to Image > Adjustments > Hue and Saturation.
Step 2
Putting a check mark in the “Colorize” field turns anything that’s selected into a variation on the color that I have in my foreground. So now the outer rim is a pretty blue.
Result
I do the same with the other lighter pink areas in the piece.
Result
Then I select the darker pink area and repeat.
Result
I have now changed the pink ornament to a blue one. Pretty!
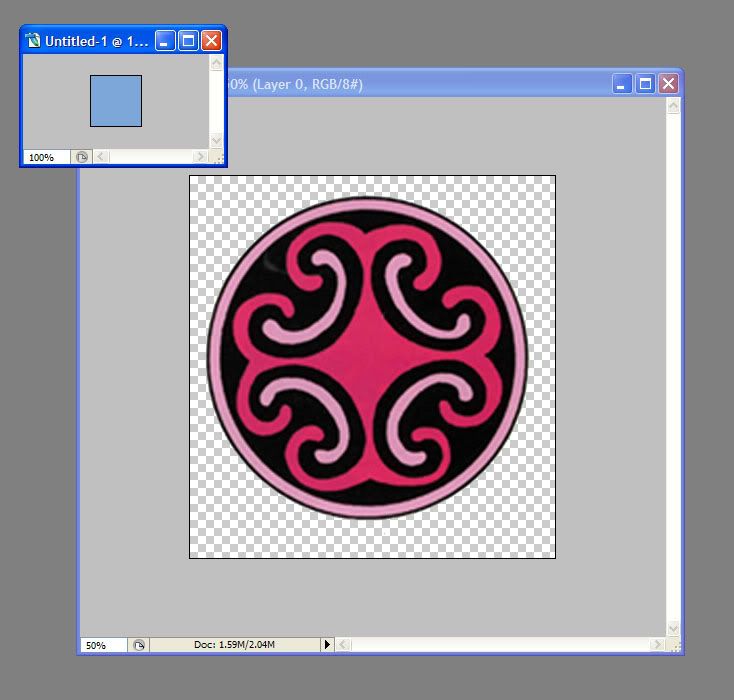
There’s another way to change the color of a picture, although it doesn’t allow for varying the color. Going back to the original pink ornament, I’m going to create a new document and fill it with the blue that I’m using. It doesn’t have to be a big document; just 50x50 pixels is fine.
Step 1
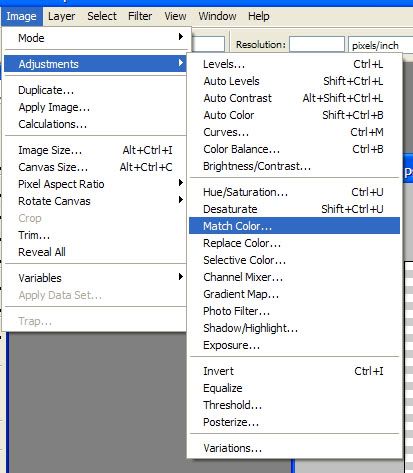
Now I’m going to go to Image > Adjustments > Match Color.
Step 2
In the “Source” drop-down, I select the name of the document that has the color I want (in this case, it’s “Untitled-1” because I didn’t save the 50x50 file). Click OK.
Window
Here’s the result:
Result
Now this isn’t a perfect method. As you can see, it changed the pink areas to a white and the black areas are now bluish. Sometimes this works, and sometimes it doesn’t. Play around with it and when it works, great. When it doesn’t, try something else. I have found that this works great when you are participating in a challenge or competition and have to use specific colors from a palette.
I hope that this tutorial has been helpful. If you have any questions, please don’t hesitate to email me at maitri@mchsi.com or IM me at MaitriScraps on AOL IM. Comments on the blog are always appreciated.
To download the frames and ornament that I was working with, click
Here.
Happy scrapping!
No comments:
Post a Comment