
This tutorial is a basic introduction to some of the tools, tips, and tricks you can use for editing photos in Photoshop.
I’ll take a picture, cut out the main figure, put it on a different background, touch up some flaws, move some parts around, and add lighting and shadows.
Here’s my original picture:
Original picture
What a cute kid! Yes, he’s mine J And yes, that’s me holding him. But I digress.
It’s a cute picture, but it’s not something I’d want to hang on my wall.
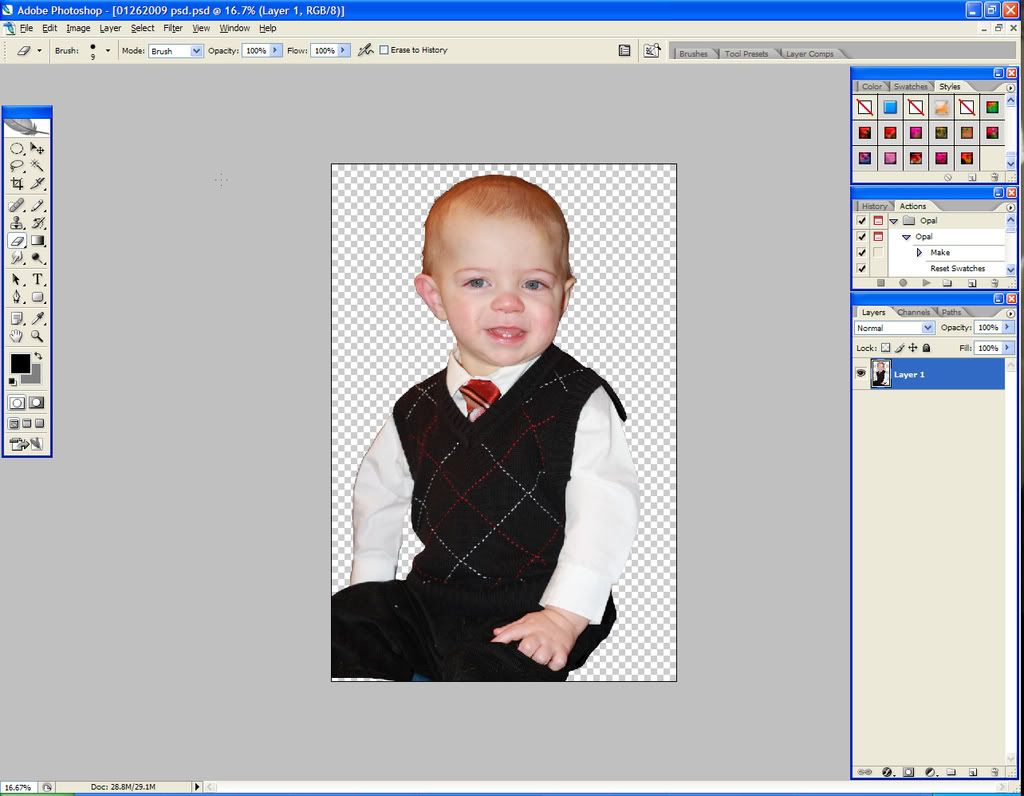
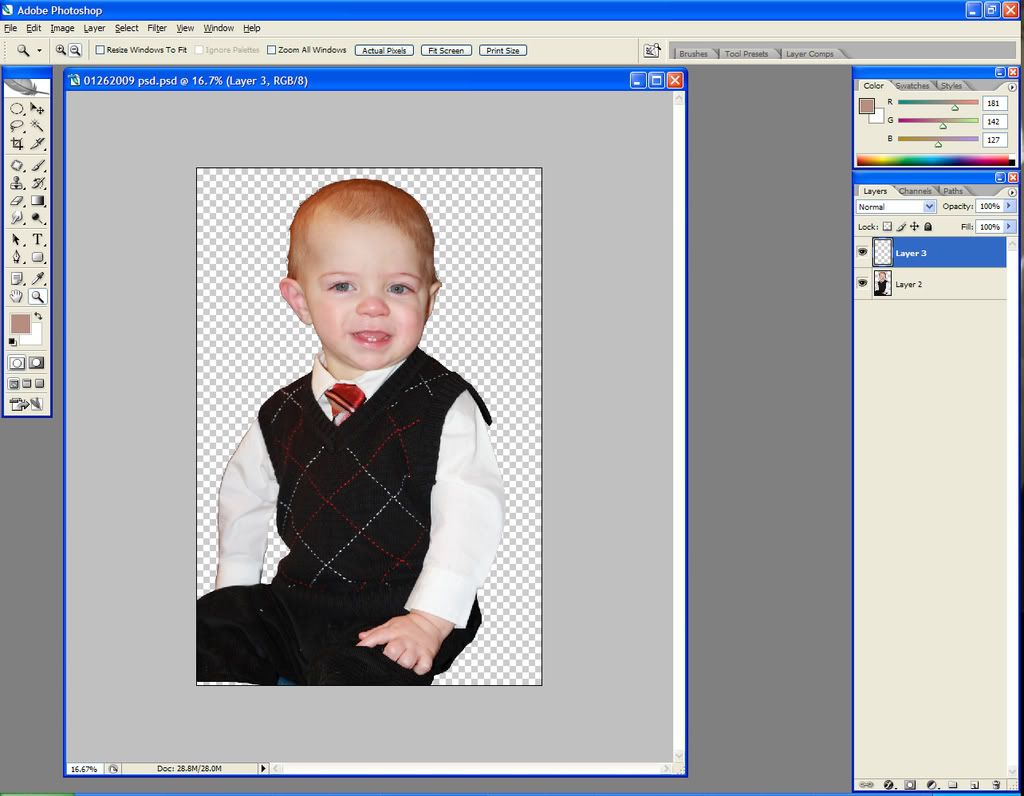
I’m going to cut him out of the background, using the Lasso tool. I just draw a general shape around him – close to him, but not right against him – and cut into a new layer. Then I delete the old layer that has the background. Here’s what I’m left with:
Step 1
I’m going to zoom in (Ctrl+=) as close as I can, and erase all of the excess background. You want to be zoomed in, so that you’re not erasing too much of your subject. Tips for erasing background:
- Be careful and go slowly.
- Save often
- Use a medium-sized brush, and go around once. Then, using a small brush, go get the corners.
- For hair, use a softer brush and reduce the opacity/flow to 50/50 or even more
You can use the Magic Background Eraser, but I prefer to at least trace the subject with the regular Eraser first. Saves time and headaches.
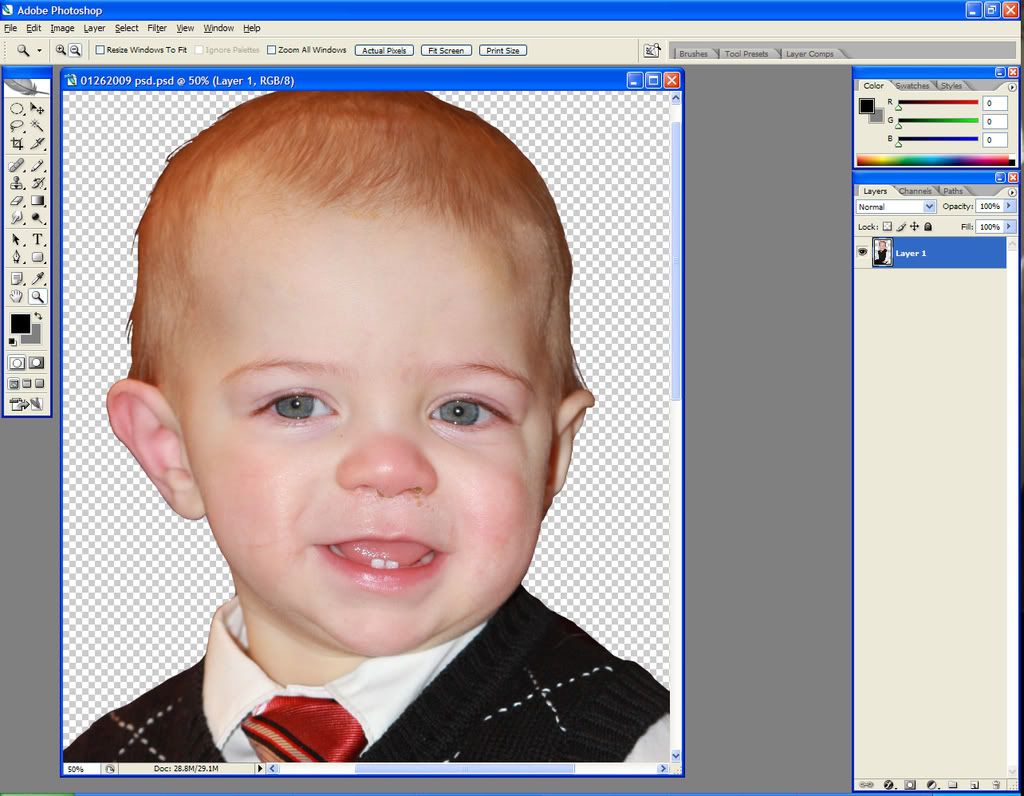
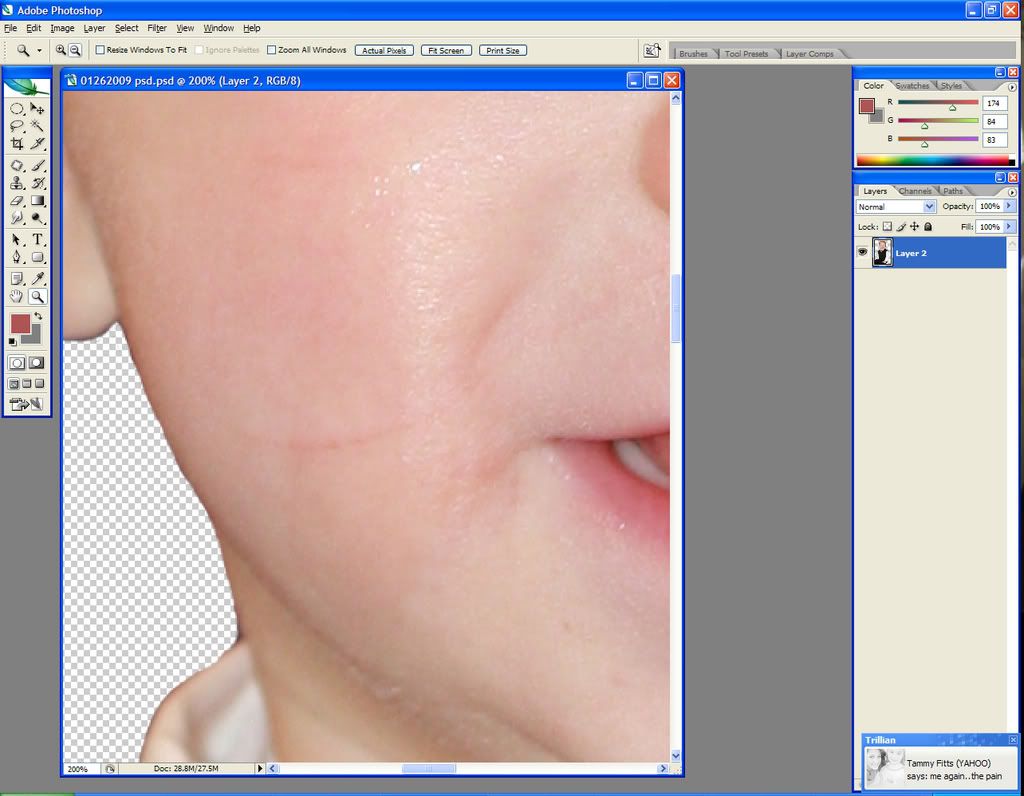
Ok so here we are with the finished erased subject. I’ve zoomed into his face because we’re about to move on to touch-ups:
Step 2
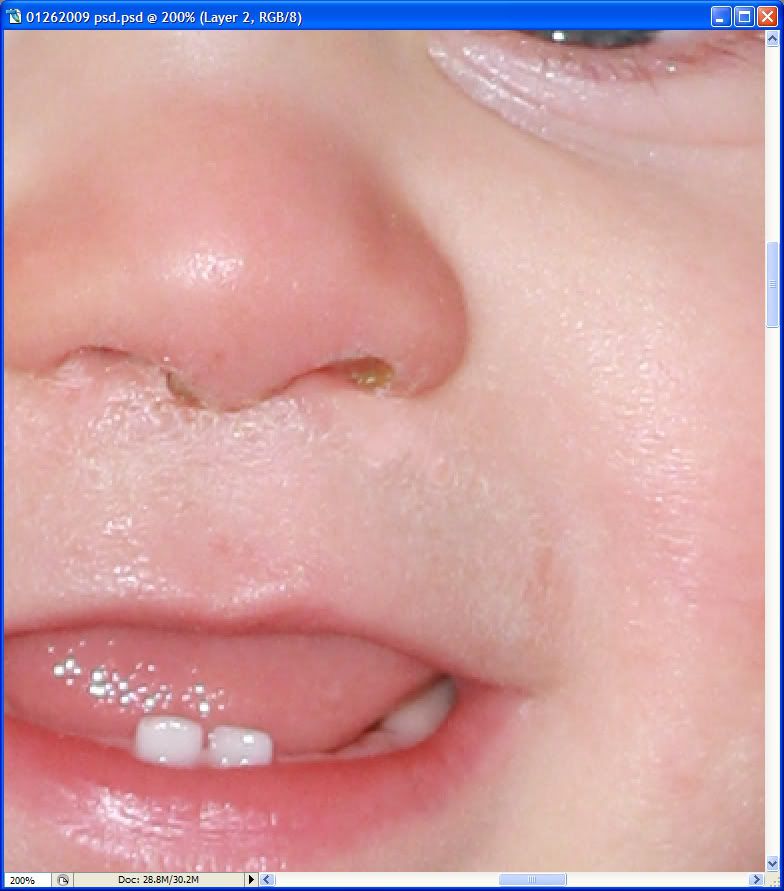
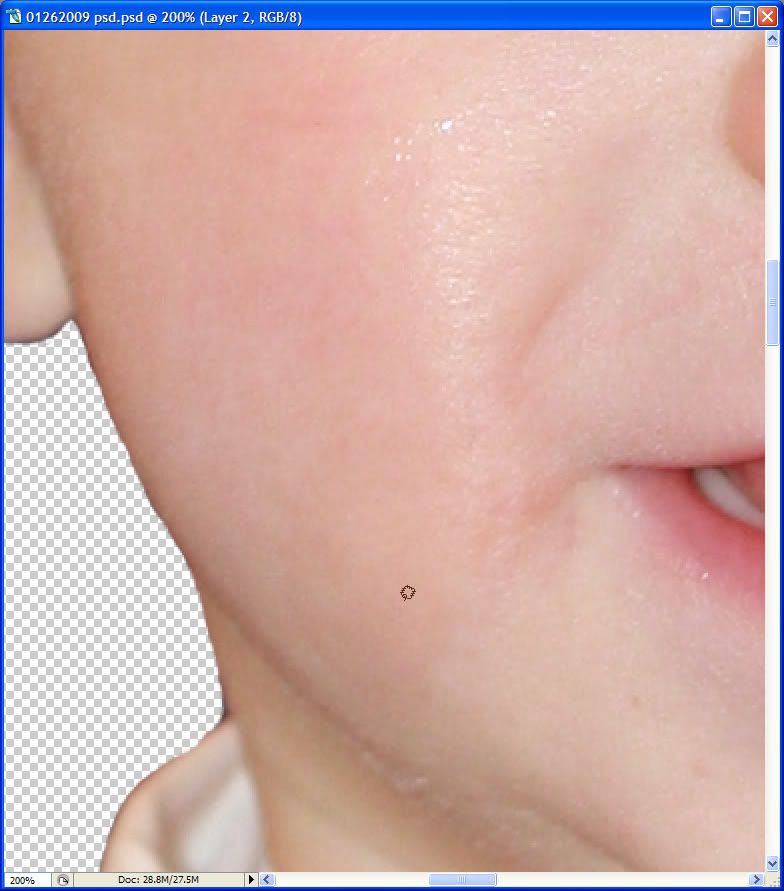
As cute as he is, there’s major things that I want to fix here. First and foremost is the booger situation. No can have. I’m going to digitally paint over the boogers to make them go away.
I create a new layer. I choose the Airbrush tool, and set my opacity and flow to 50% and 50%. Zooming in is important here. Using the Color Picker tool, I select a color near where I want to paint, and then I start painting.
Step 3
If you look closely, you can see where I’ve painted; it’s missing texture that the rest of the skin has. I’ll fix that once I’m done painting.
Here it is with all of the painting on the nose area complete:
Step 3a
I save my work, and then merge the painted layer with the main layer.
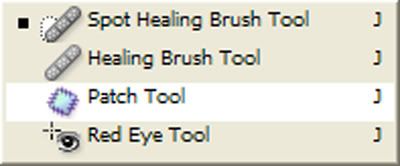
Now I’m going to use the Patch Tool:
Step 4
This tool lets you incorporate texture in different areas. I highlight an area of the nose that has skin texture:
Step 4a
And move the selected area on top of a painted area. Voila! Instant texture.
Tips to using the Patch Tool:
- Go slowly
- Save often
- Undo (Ctrl+Z) is your best friend.
- Zoom out often to check your work.
I’m going to use the Patch Tool to remove the scratch on Kiddo’s right cheek. Before:
Step 5
After:
Step 5a
I also use the patch tool to get rid of the bruise on his upper left forehead (where he conveniently bonked his head on the window right before our photographer arrived). Here is the end result after all of my patching:
Step 6
Now I want to add a new background. I have some that I bought from www.renderosity.com entitled “Behind You Portrait Backgrounds.” I like this purple one, so I add it to the picture. Note that I move it under the layer that has my son’s picture:
Step 7
But now it looks like he’s sitting on air. That won’t do. I insert a layer between his picture and the background layer, and paint in some black cloth (just normal brush strokes and then a Filter > Texturizer > Canvas filter).
Step 8
There, that’s better.
Now it’s time to add some lighting. Right now, he doesn’t really look like he’s posing in front of that purple backdrop. I want to bring in some subtle lights to make it look more realistic.
I’m going to duplicate my background layer, the purple cloth.
On the top purple layer, I’m going to do Filter > Render > Lighting Effects in the following settings:
Step 9
Why am I adding brown? Well, when I erased the background from around him, I noticed some very faint brown shadows coming from his lower right. So I am adding in some brown shadows.
On the layer that I just added the brown shadows, I am going to change my primary layer setting to Screen. This usually brightens the layer. I adjust my opacity settings until I’m happy with the result.
Now, I duplicate the layer with my son’s picture, and add the same lighting effect. This one I’m going to set to Color Dodge:
Step 10
Adding lighting and shadows is often just a matter of trial and error. Look at the picture and try to see where the light is coming from, and add points of light and shadow accordingly. Likewise, you may find that you prefer different settings of opacity and overlay than I do. It’s all dependant upon your own preferences and there’s no right or wrong way to do it.
Now I want to bring in some purple tones, to make it look like he is, in fact, sitting in front of the purple backdrop. Once again, I duplicate my background and subject layers. Here are the settings for the lighting:
Step 11
You may be wondering why I keep duplicating my layers. There are a couple of answers. First of all, I don’t want to screw up my original layers. I always make a copy and I can always hide it if I want to, but if I make changes to my original that I can’t get back, I will be unhappy. I learned that over several years of ruining my original layers.
Secondly, usually when I add lighting effects, the duplicated layers are not full strength. You can get great effects by duplicating a layer, adding a lighting effect, and changing it to Multiply, Screen, Overlay, or one of the other settings. Play around with it until you like what you see.
So here’s my picture in progress. You can see three background layer copies, and three subject layer copies:
Step 12
Now I want to Burn in some shadows. On the original subject layer, I click “Lock Transparent Pixels.”
Lock Transparent Layers
This makes it so that when you Burn around the edge of the picture, you’re not burning empty pixels, just the picture.
Now with the Burn tool, with the settings at Shadows and 50%, I use a large soft brush and slowly burn around the edge. Again, go slowly and save often. Undo if it looks too dark. You only want a hint of shadow.
Also, on my original layer with the picture of Kiddo, I added a Drop Shadow and played with the settings until it looks like his shadow is down on the backdrop.
My next step is to move his right arm (our left). I don’t like the way it’s sticking out (because I was holding him but I erased my hand). Unlock the Transparent Layers in the original picture. Using the Magnetic Lasso Tool, I select just the white part of his arm:
Step 13
I cut the selection to its own layer, and move that layer beneath the original picture layer. I nudge the selection to the right until it looks like he’s holding his arm against his side:
Step 14
Oops! Now you can see remnants of the white part from the duplicated layers. We’ll have to delete those. Using the Magnetic Lasso again, I select the offending area:
Step 15
then I click on the two duplicated layers and hit the Delete key to clear that selection from them.
And with that, I’m done! Here’s the completed picture:
Finished!
So now it looks like he’s sitting in front of a purple cloth backdrop, and his facial blemishes are all cleared up (I wish I could do the same to myself in real life!).
I hope this tutorial has helped you in some way.
Comments, questions, and feedback are always welcome! If you have a topic that you’d like to see a tutorial on, please let me know. My email is maitri@mchsi.com, or I am on AOL IM as MaitriScraps.
Happy scrapping!
I’ll take a picture, cut out the main figure, put it on a different background, touch up some flaws, move some parts around, and add lighting and shadows.
Here’s my original picture:
Original picture
What a cute kid! Yes, he’s mine J And yes, that’s me holding him. But I digress.
It’s a cute picture, but it’s not something I’d want to hang on my wall.
I’m going to cut him out of the background, using the Lasso tool. I just draw a general shape around him – close to him, but not right against him – and cut into a new layer. Then I delete the old layer that has the background. Here’s what I’m left with:
Step 1
I’m going to zoom in (Ctrl+=) as close as I can, and erase all of the excess background. You want to be zoomed in, so that you’re not erasing too much of your subject. Tips for erasing background:
- Be careful and go slowly.
- Save often
- Use a medium-sized brush, and go around once. Then, using a small brush, go get the corners.
- For hair, use a softer brush and reduce the opacity/flow to 50/50 or even more
You can use the Magic Background Eraser, but I prefer to at least trace the subject with the regular Eraser first. Saves time and headaches.
Ok so here we are with the finished erased subject. I’ve zoomed into his face because we’re about to move on to touch-ups:
Step 2
As cute as he is, there’s major things that I want to fix here. First and foremost is the booger situation. No can have. I’m going to digitally paint over the boogers to make them go away.
I create a new layer. I choose the Airbrush tool, and set my opacity and flow to 50% and 50%. Zooming in is important here. Using the Color Picker tool, I select a color near where I want to paint, and then I start painting.
Step 3
If you look closely, you can see where I’ve painted; it’s missing texture that the rest of the skin has. I’ll fix that once I’m done painting.
Here it is with all of the painting on the nose area complete:
Step 3a
I save my work, and then merge the painted layer with the main layer.
Now I’m going to use the Patch Tool:
Step 4
This tool lets you incorporate texture in different areas. I highlight an area of the nose that has skin texture:
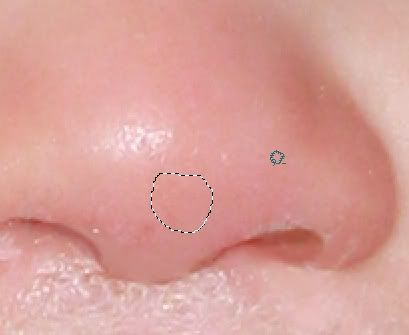
Step 4a
And move the selected area on top of a painted area. Voila! Instant texture.
Tips to using the Patch Tool:
- Go slowly
- Save often
- Undo (Ctrl+Z) is your best friend.
- Zoom out often to check your work.
I’m going to use the Patch Tool to remove the scratch on Kiddo’s right cheek. Before:
Step 5
After:
Step 5a
I also use the patch tool to get rid of the bruise on his upper left forehead (where he conveniently bonked his head on the window right before our photographer arrived). Here is the end result after all of my patching:
Step 6
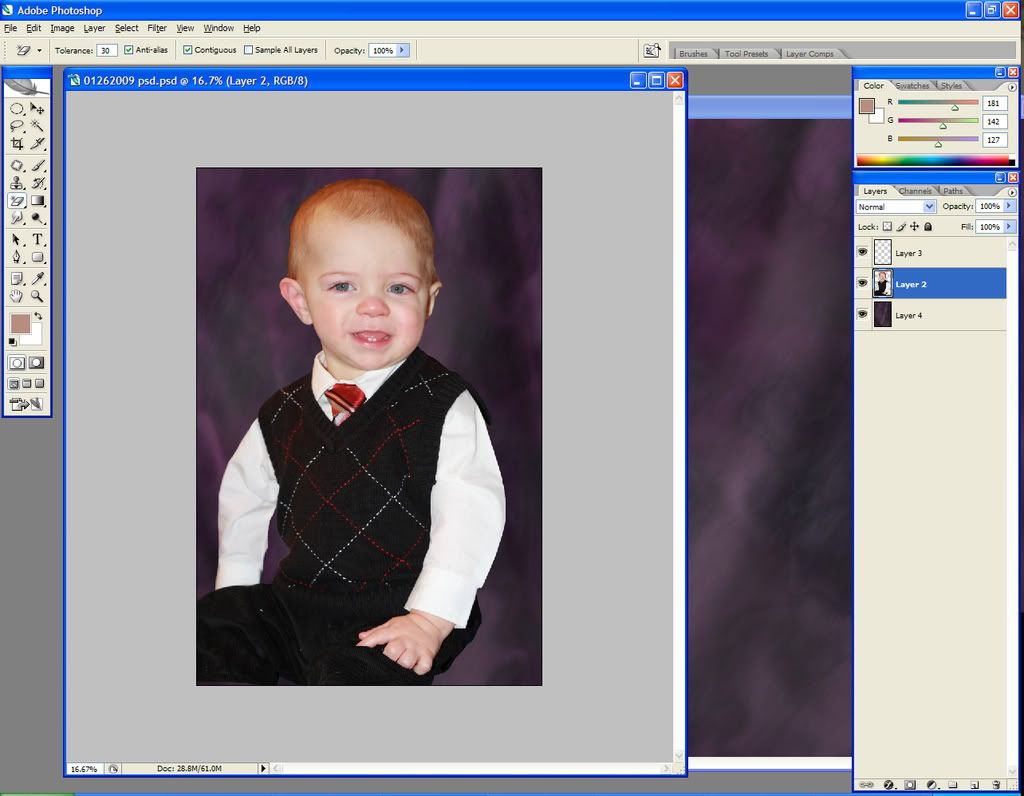
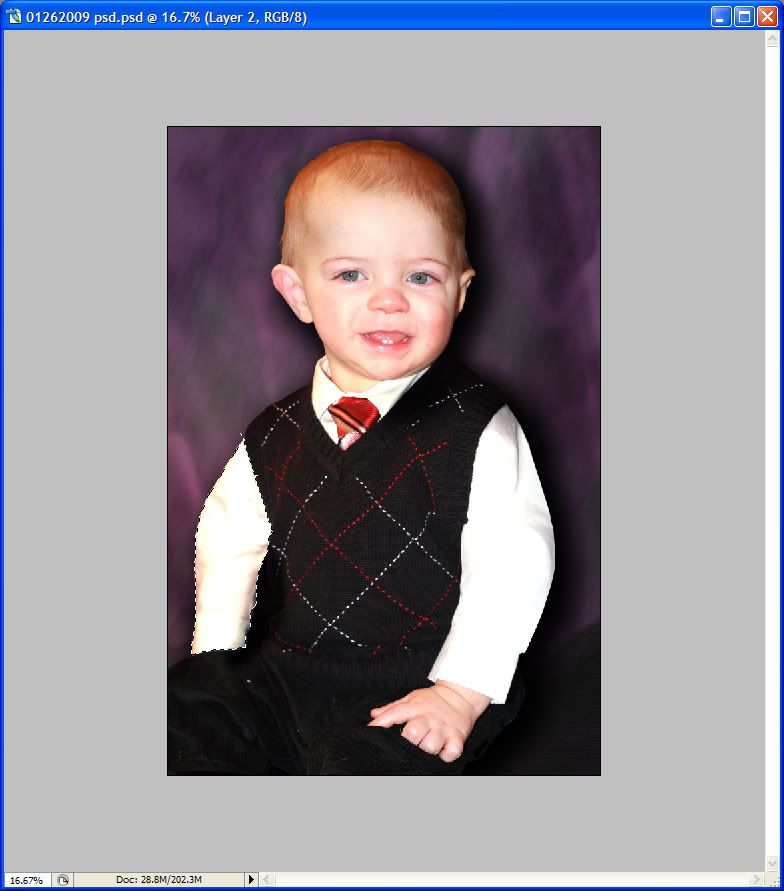
Now I want to add a new background. I have some that I bought from www.renderosity.com entitled “Behind You Portrait Backgrounds.” I like this purple one, so I add it to the picture. Note that I move it under the layer that has my son’s picture:
Step 7
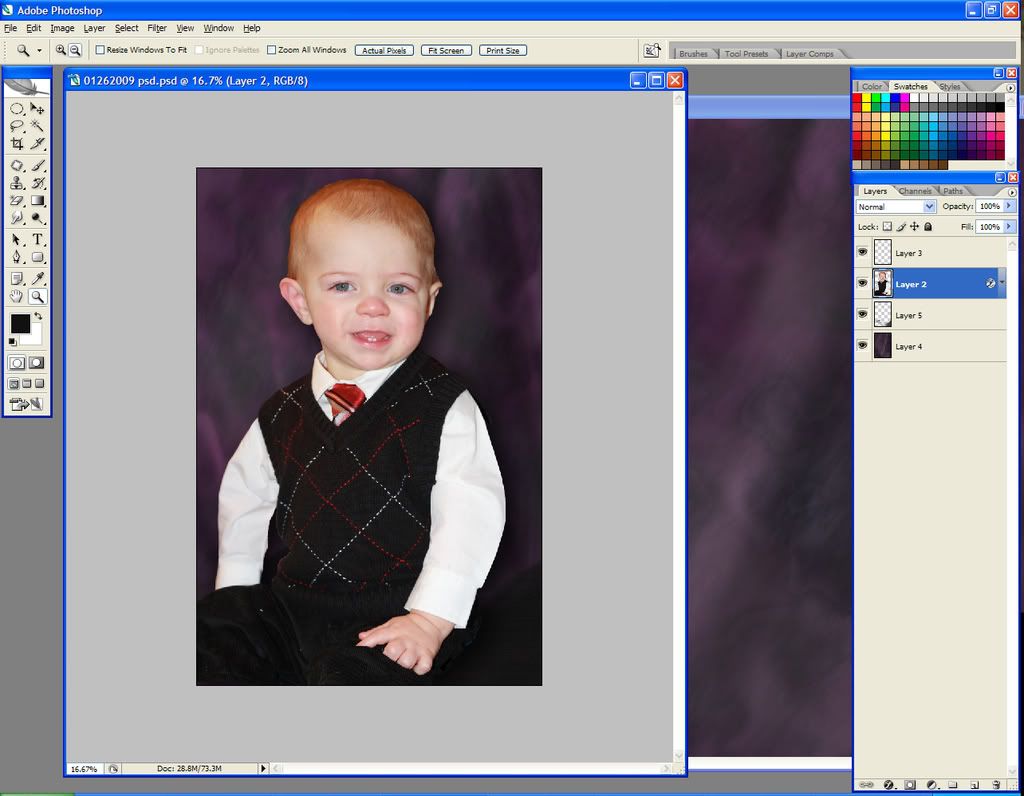
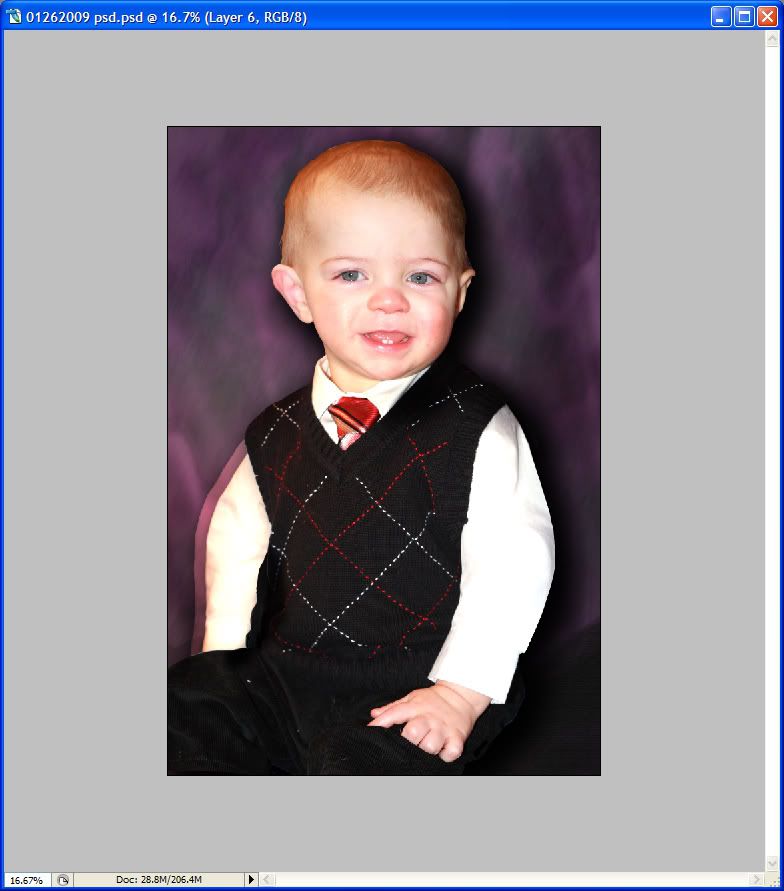
But now it looks like he’s sitting on air. That won’t do. I insert a layer between his picture and the background layer, and paint in some black cloth (just normal brush strokes and then a Filter > Texturizer > Canvas filter).
Step 8
There, that’s better.
Now it’s time to add some lighting. Right now, he doesn’t really look like he’s posing in front of that purple backdrop. I want to bring in some subtle lights to make it look more realistic.
I’m going to duplicate my background layer, the purple cloth.
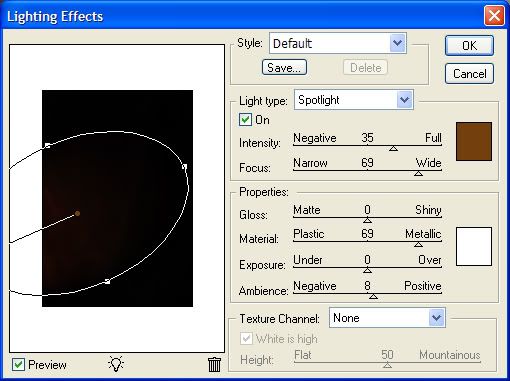
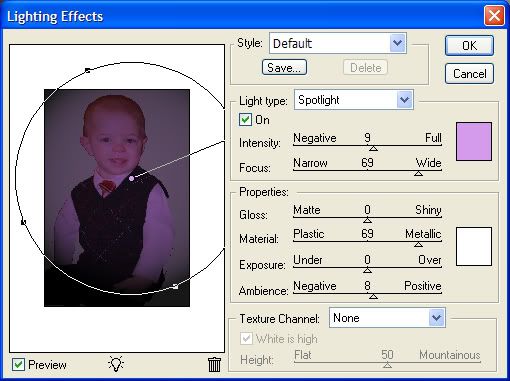
On the top purple layer, I’m going to do Filter > Render > Lighting Effects in the following settings:
Step 9
Why am I adding brown? Well, when I erased the background from around him, I noticed some very faint brown shadows coming from his lower right. So I am adding in some brown shadows.
On the layer that I just added the brown shadows, I am going to change my primary layer setting to Screen. This usually brightens the layer. I adjust my opacity settings until I’m happy with the result.
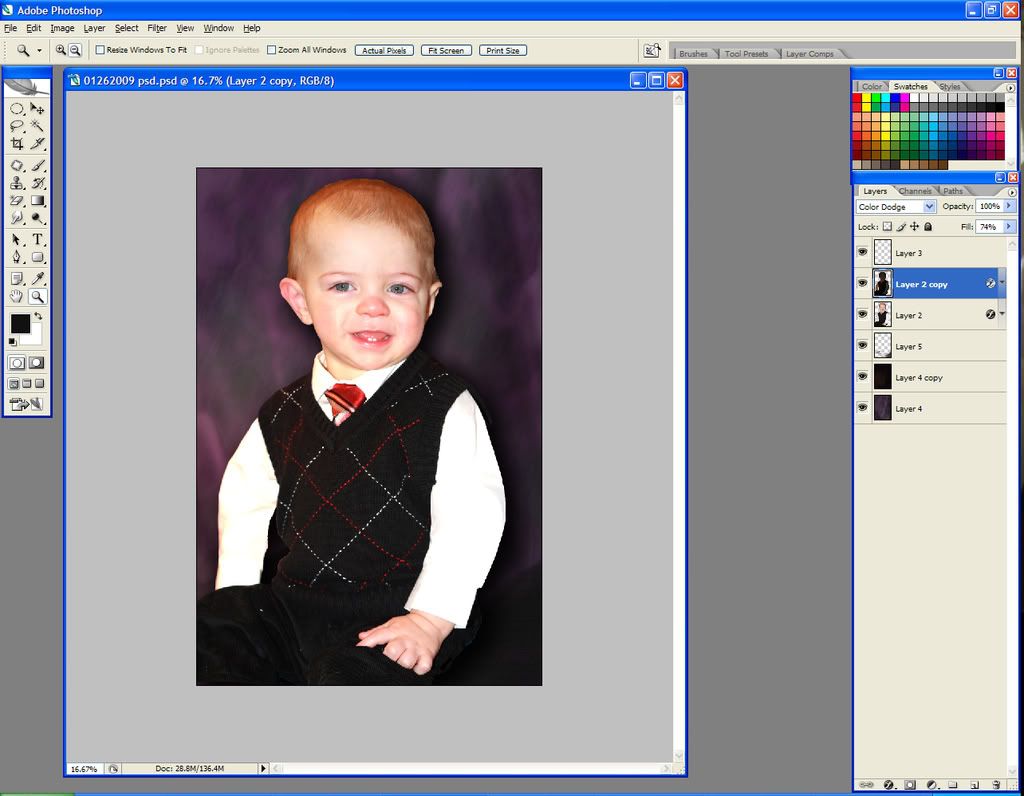
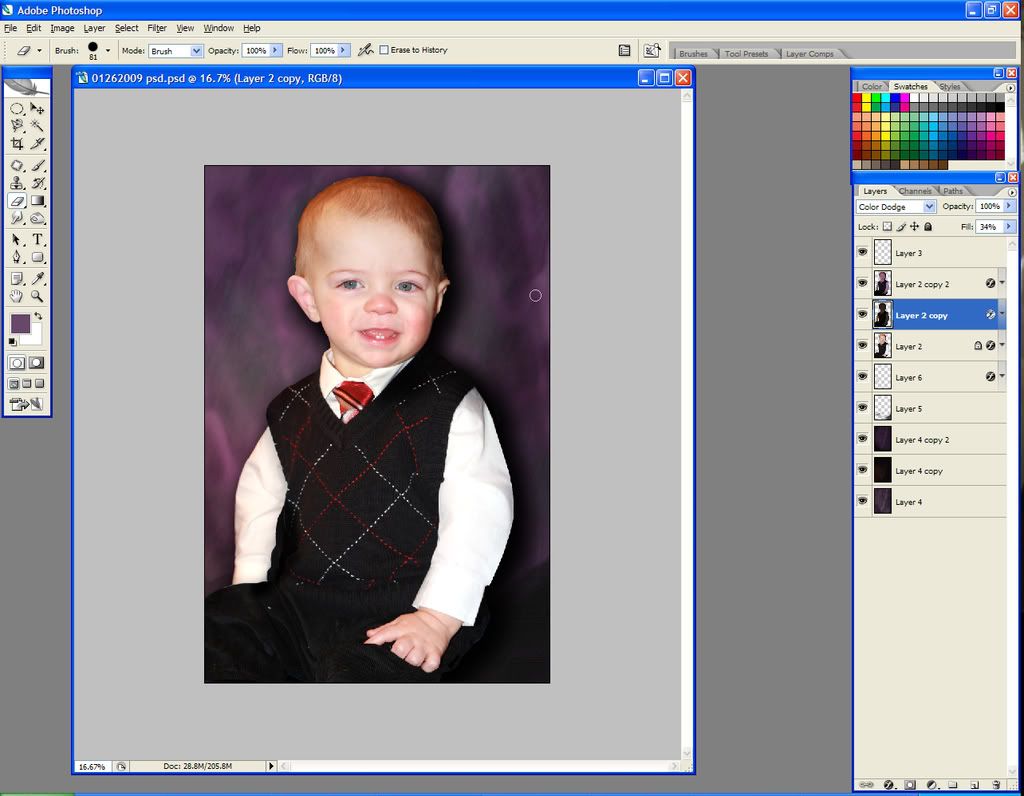
Now, I duplicate the layer with my son’s picture, and add the same lighting effect. This one I’m going to set to Color Dodge:
Step 10
Adding lighting and shadows is often just a matter of trial and error. Look at the picture and try to see where the light is coming from, and add points of light and shadow accordingly. Likewise, you may find that you prefer different settings of opacity and overlay than I do. It’s all dependant upon your own preferences and there’s no right or wrong way to do it.
Now I want to bring in some purple tones, to make it look like he is, in fact, sitting in front of the purple backdrop. Once again, I duplicate my background and subject layers. Here are the settings for the lighting:
Step 11
You may be wondering why I keep duplicating my layers. There are a couple of answers. First of all, I don’t want to screw up my original layers. I always make a copy and I can always hide it if I want to, but if I make changes to my original that I can’t get back, I will be unhappy. I learned that over several years of ruining my original layers.
Secondly, usually when I add lighting effects, the duplicated layers are not full strength. You can get great effects by duplicating a layer, adding a lighting effect, and changing it to Multiply, Screen, Overlay, or one of the other settings. Play around with it until you like what you see.
So here’s my picture in progress. You can see three background layer copies, and three subject layer copies:
Step 12
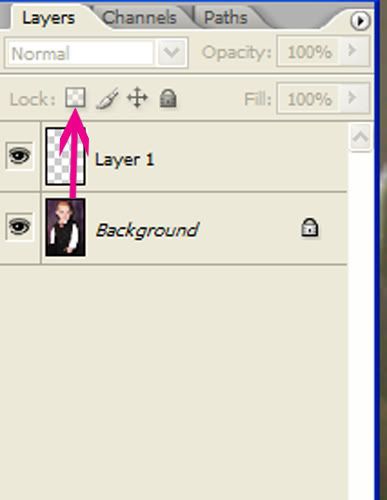
Now I want to Burn in some shadows. On the original subject layer, I click “Lock Transparent Pixels.”
Lock Transparent Layers
This makes it so that when you Burn around the edge of the picture, you’re not burning empty pixels, just the picture.
Now with the Burn tool, with the settings at Shadows and 50%, I use a large soft brush and slowly burn around the edge. Again, go slowly and save often. Undo if it looks too dark. You only want a hint of shadow.
Also, on my original layer with the picture of Kiddo, I added a Drop Shadow and played with the settings until it looks like his shadow is down on the backdrop.
My next step is to move his right arm (our left). I don’t like the way it’s sticking out (because I was holding him but I erased my hand). Unlock the Transparent Layers in the original picture. Using the Magnetic Lasso Tool, I select just the white part of his arm:
Step 13
I cut the selection to its own layer, and move that layer beneath the original picture layer. I nudge the selection to the right until it looks like he’s holding his arm against his side:
Step 14
Oops! Now you can see remnants of the white part from the duplicated layers. We’ll have to delete those. Using the Magnetic Lasso again, I select the offending area:
Step 15
then I click on the two duplicated layers and hit the Delete key to clear that selection from them.
And with that, I’m done! Here’s the completed picture:
Finished!
So now it looks like he’s sitting in front of a purple cloth backdrop, and his facial blemishes are all cleared up (I wish I could do the same to myself in real life!).
I hope this tutorial has helped you in some way.
Comments, questions, and feedback are always welcome! If you have a topic that you’d like to see a tutorial on, please let me know. My email is maitri@mchsi.com, or I am on AOL IM as MaitriScraps.
Happy scrapping!
No comments:
Post a Comment