This tutorial will walk you through the process of adding depth to layers in Photoshop, without using drop shadow.
When creating scrapbooking elements for sale, or for use in multiple projects, you don’t want to use a drop shadow, because you want to be able to manipulate the element around in layouts.
However, when you are creating a new element that has multiple layers, you may want to add depth/shadow for realism. In this tutorial, I’ll show you how to do that.
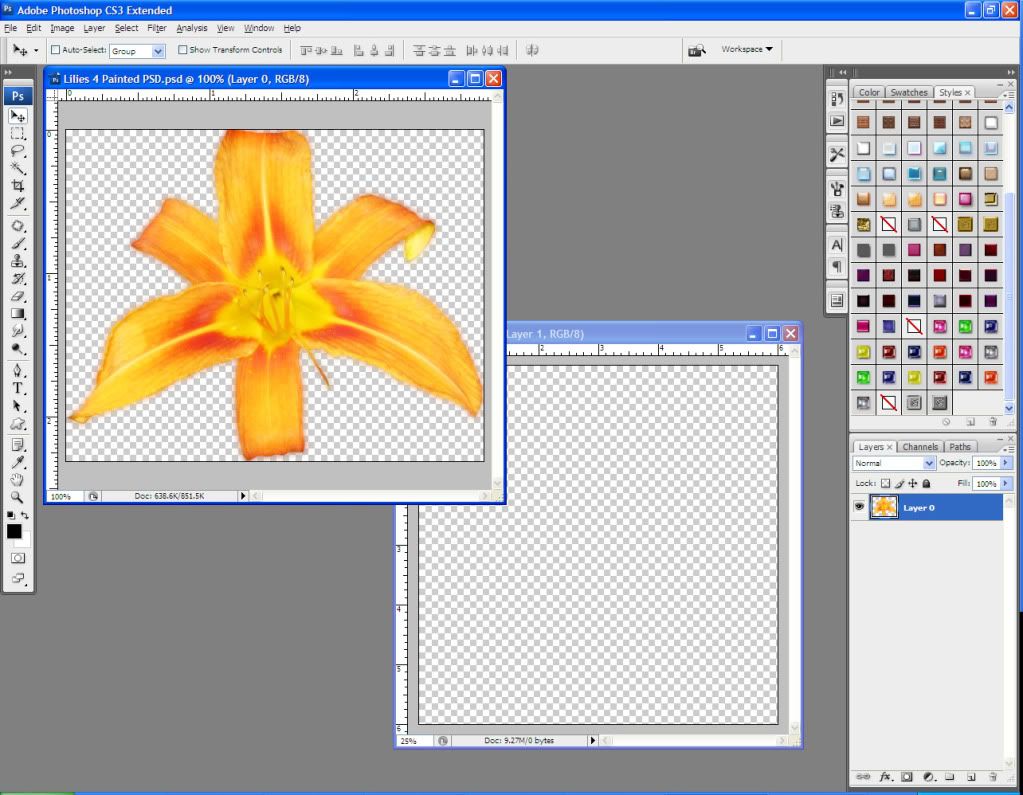
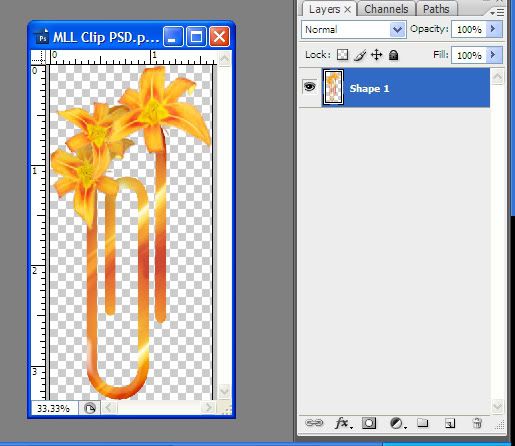
I’m going to create a paper clip with some cute lilies attached. I have the lily file open, and I create a new document, 6 inches by 6 inches, 300 dpi.
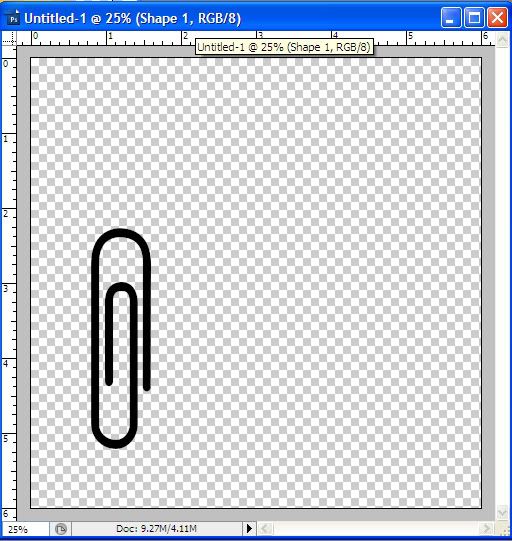
Using the shape menu, I create a paper clip and then flip it vertically.
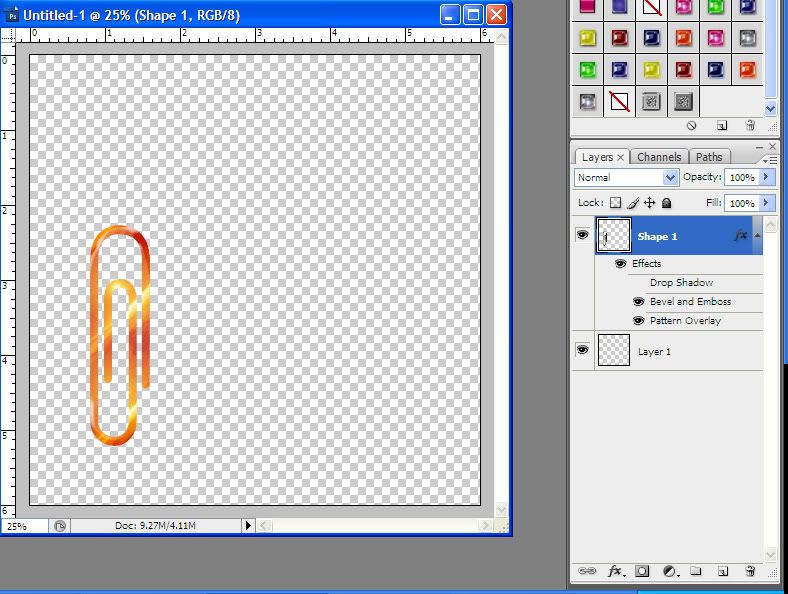
I add a layer style – this particular one is a Baltic Glass Style. To cement in the style, I create a new layer, move it below my clip layer, then merge the two layers (Ctrl + E).
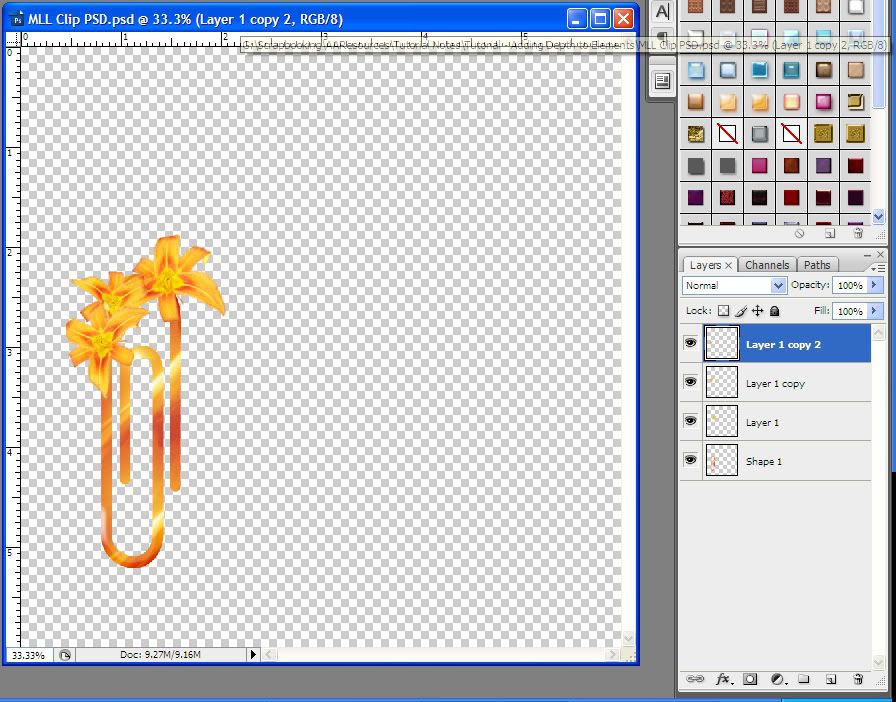
Now I move my lily over to my paper clip document. I want to have several lilies along the clip’s edge, so I duplicate the lily layer two times. I arrange the lilies the way I want them – I’m going to use Transform > Warp to edit each one so that they don’t all look the same.
Here’s how to add the shadows to make the clip look 3-dimensional. On my topmost layer, I Ctrl+left click the thumbnail to select everything on that layer – in this case, the lily on top. I create a new layer and move it below this layer.
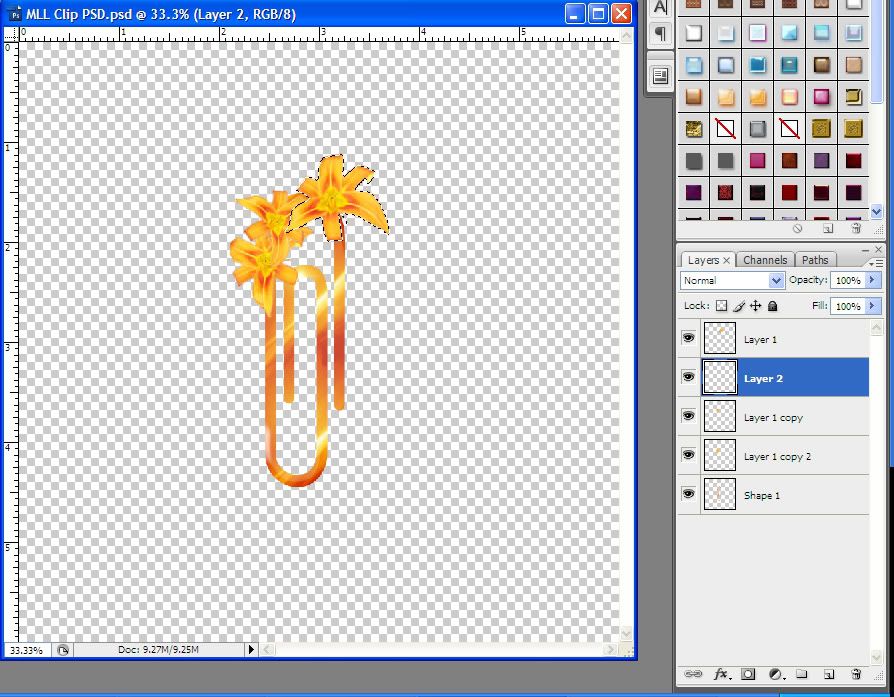
I hit the D key to reset my default colors to black/white. On my new layer, I Fill > Foreground Color to fill the selection with black. I hit the V key to go to Move mode, and I move the shadow down and to the right a few pixels.
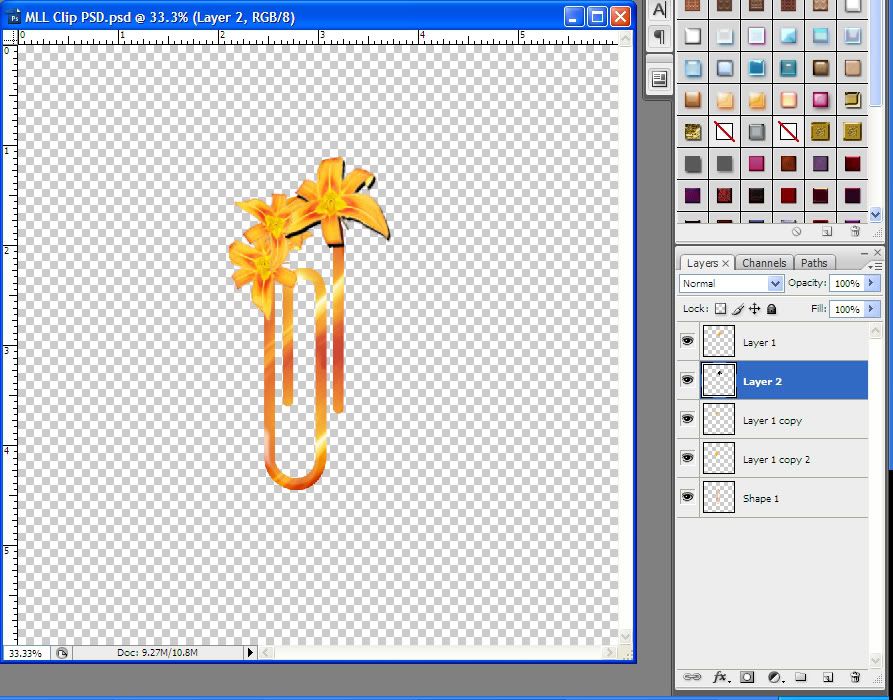
Now I go to Filter > Blur > Gaussian Blur and blur it at around 45 setting to make a realistic shadow. I change this shadow layer to Multiply and the Fill Opacity to around 30%.
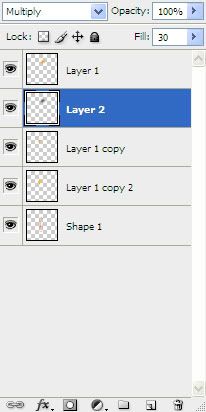
That looks pretty good, but the shadow goes past the outlines of the element, which is no good. So, I’m going to select each of the layers below so that I can delete excess shadow.
I Ctrl+left click on the next layer down (the 2nd lily) thumbnail to select what’s in that layer. I left click on the body of the next layer after that (the 3rd lily) and go to Select > Load Selection and choose “Add to Selection.”
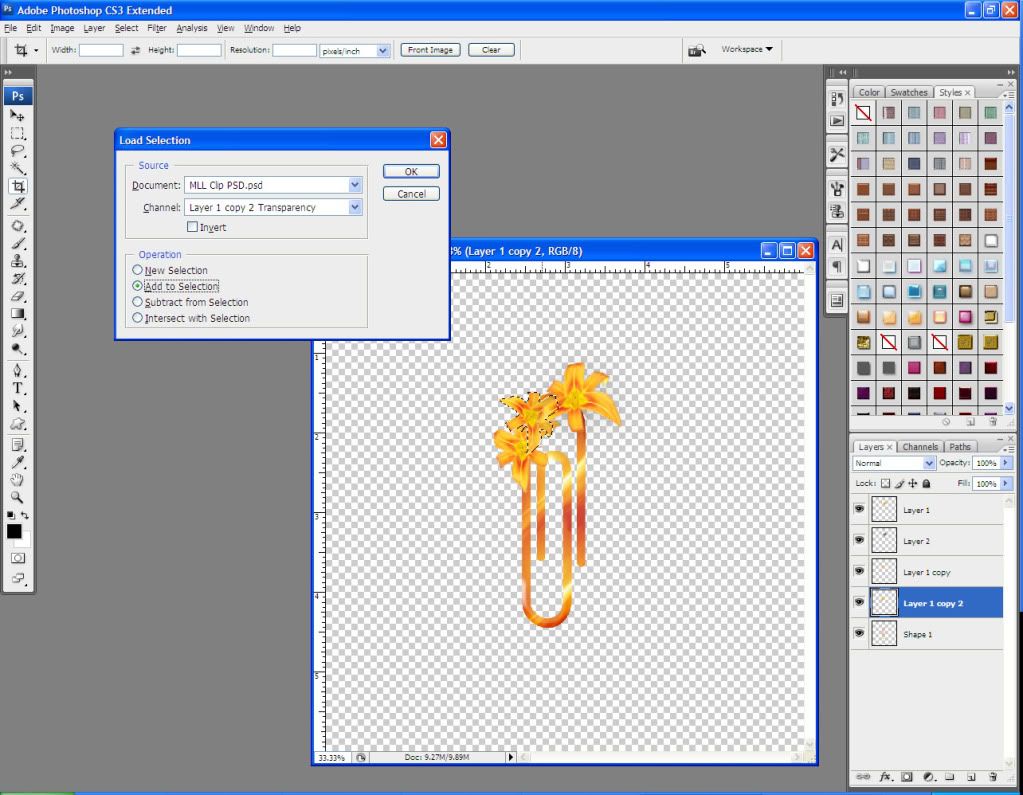
I then do the same thing with the clip layer – I left click on the body of the layer, and go to Select > Load Selection, and choose “Add to Selection.”
At this point, I have my clip, and the next 2 lilies all selected at the same time. I go to Select > Inverse. I make sure that I have my shadow layer active, and I hit the Delete key. This will clear all of the shadow that is not on the element.
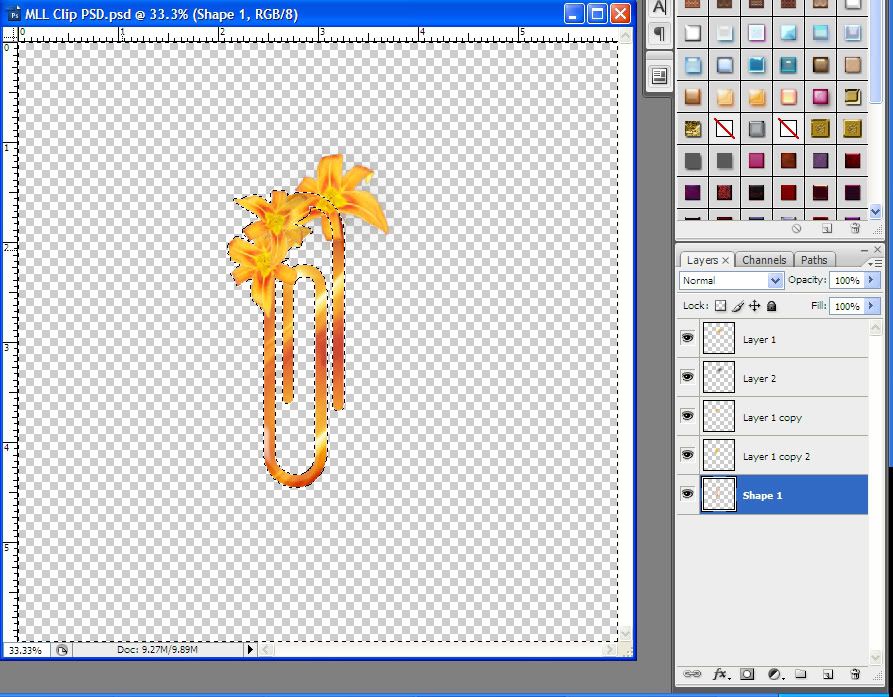
I repeat this process for each of my lilies. Note that the further down you go in the layer tree, the fewer times you have to Add to Selection. When you create the shadow for the 3rd lily, you should only have to select the clip layer, then Select Inverse, and Delete.
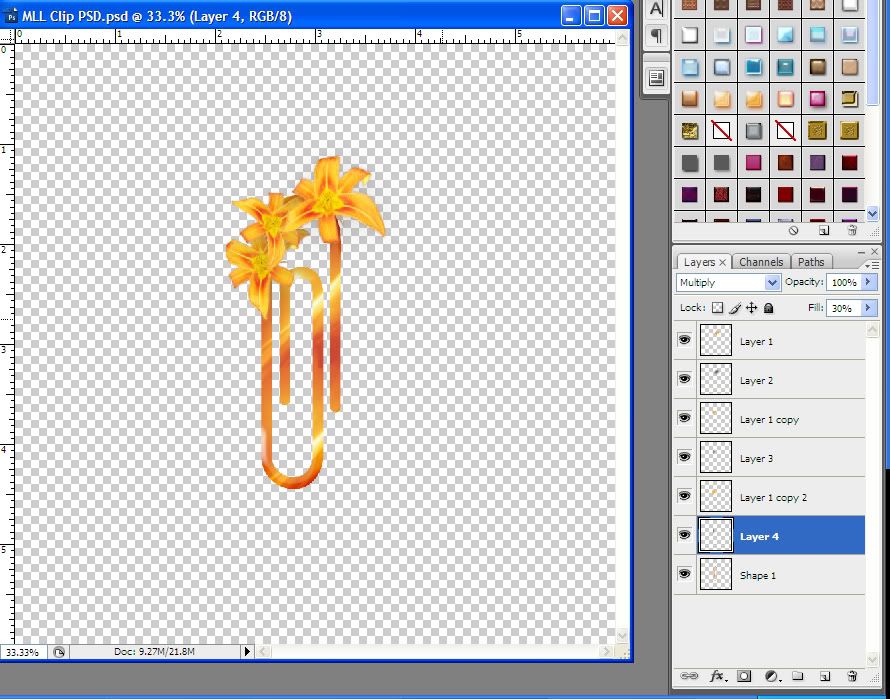
What I always do before merging my layers and saving, is to create a new layer and put it behind all other layers. I then fill that layer with white or a light grey, to check for stray pixels or extra shadow that shouldn’t be there.
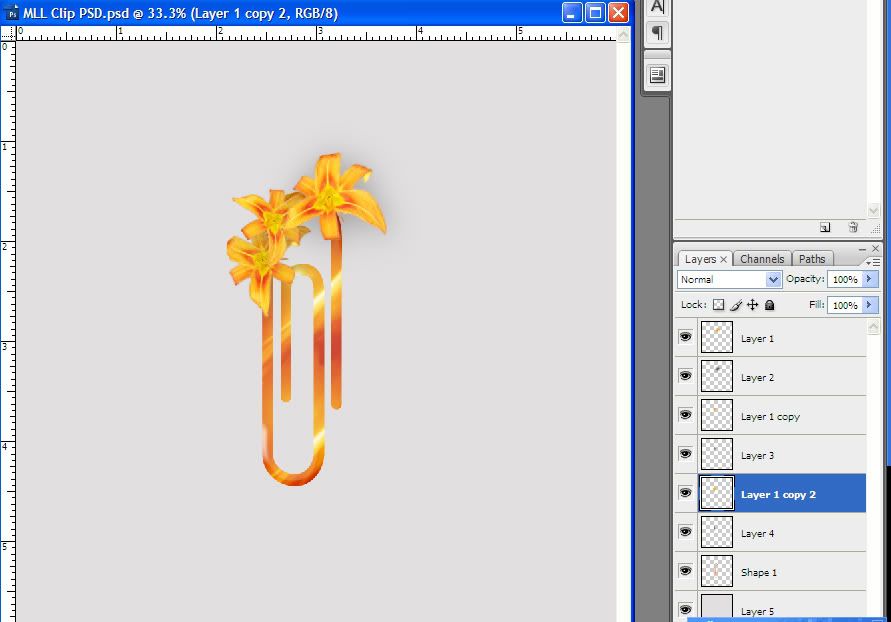
Oh, see, now the shadow behind the 1st lily somehow didn’t get erased. If I hadn’t added the light grey behind my element, I would never have known. So I go through the process again to delete that excess shadow.
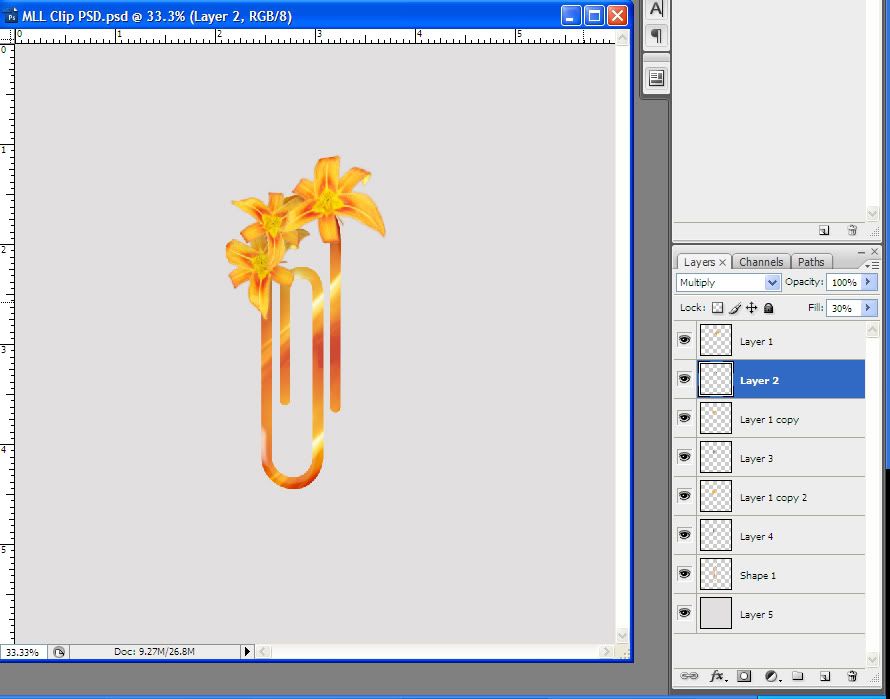
Once I am happy with my shadows, I can delete my grey background, merge all layers, Image > Trim by transparent pixels, and save this clip as a .png file.
You can download this clip here.
Thanks for reading! If you have any questions, please let me know at maitri@mchsi.com.
Suggestions for future tutorials are always welcome.
When creating scrapbooking elements for sale, or for use in multiple projects, you don’t want to use a drop shadow, because you want to be able to manipulate the element around in layouts.
However, when you are creating a new element that has multiple layers, you may want to add depth/shadow for realism. In this tutorial, I’ll show you how to do that.
I’m going to create a paper clip with some cute lilies attached. I have the lily file open, and I create a new document, 6 inches by 6 inches, 300 dpi.

Using the shape menu, I create a paper clip and then flip it vertically.

I add a layer style – this particular one is a Baltic Glass Style. To cement in the style, I create a new layer, move it below my clip layer, then merge the two layers (Ctrl + E).

Now I move my lily over to my paper clip document. I want to have several lilies along the clip’s edge, so I duplicate the lily layer two times. I arrange the lilies the way I want them – I’m going to use Transform > Warp to edit each one so that they don’t all look the same.

Here’s how to add the shadows to make the clip look 3-dimensional. On my topmost layer, I Ctrl+left click the thumbnail to select everything on that layer – in this case, the lily on top. I create a new layer and move it below this layer.

I hit the D key to reset my default colors to black/white. On my new layer, I Fill > Foreground Color to fill the selection with black. I hit the V key to go to Move mode, and I move the shadow down and to the right a few pixels.

Now I go to Filter > Blur > Gaussian Blur and blur it at around 45 setting to make a realistic shadow. I change this shadow layer to Multiply and the Fill Opacity to around 30%.

That looks pretty good, but the shadow goes past the outlines of the element, which is no good. So, I’m going to select each of the layers below so that I can delete excess shadow.
I Ctrl+left click on the next layer down (the 2nd lily) thumbnail to select what’s in that layer. I left click on the body of the next layer after that (the 3rd lily) and go to Select > Load Selection and choose “Add to Selection.”

I then do the same thing with the clip layer – I left click on the body of the layer, and go to Select > Load Selection, and choose “Add to Selection.”
At this point, I have my clip, and the next 2 lilies all selected at the same time. I go to Select > Inverse. I make sure that I have my shadow layer active, and I hit the Delete key. This will clear all of the shadow that is not on the element.

I repeat this process for each of my lilies. Note that the further down you go in the layer tree, the fewer times you have to Add to Selection. When you create the shadow for the 3rd lily, you should only have to select the clip layer, then Select Inverse, and Delete.

What I always do before merging my layers and saving, is to create a new layer and put it behind all other layers. I then fill that layer with white or a light grey, to check for stray pixels or extra shadow that shouldn’t be there.

Oh, see, now the shadow behind the 1st lily somehow didn’t get erased. If I hadn’t added the light grey behind my element, I would never have known. So I go through the process again to delete that excess shadow.

Once I am happy with my shadows, I can delete my grey background, merge all layers, Image > Trim by transparent pixels, and save this clip as a .png file.

You can download this clip here.
Thanks for reading! If you have any questions, please let me know at maitri@mchsi.com.
Suggestions for future tutorials are always welcome.

Thanks for this tutorial, much appreciated
ReplyDeleteThanks so much for this tutorial, merci beaucoup, c'est super!
ReplyDelete